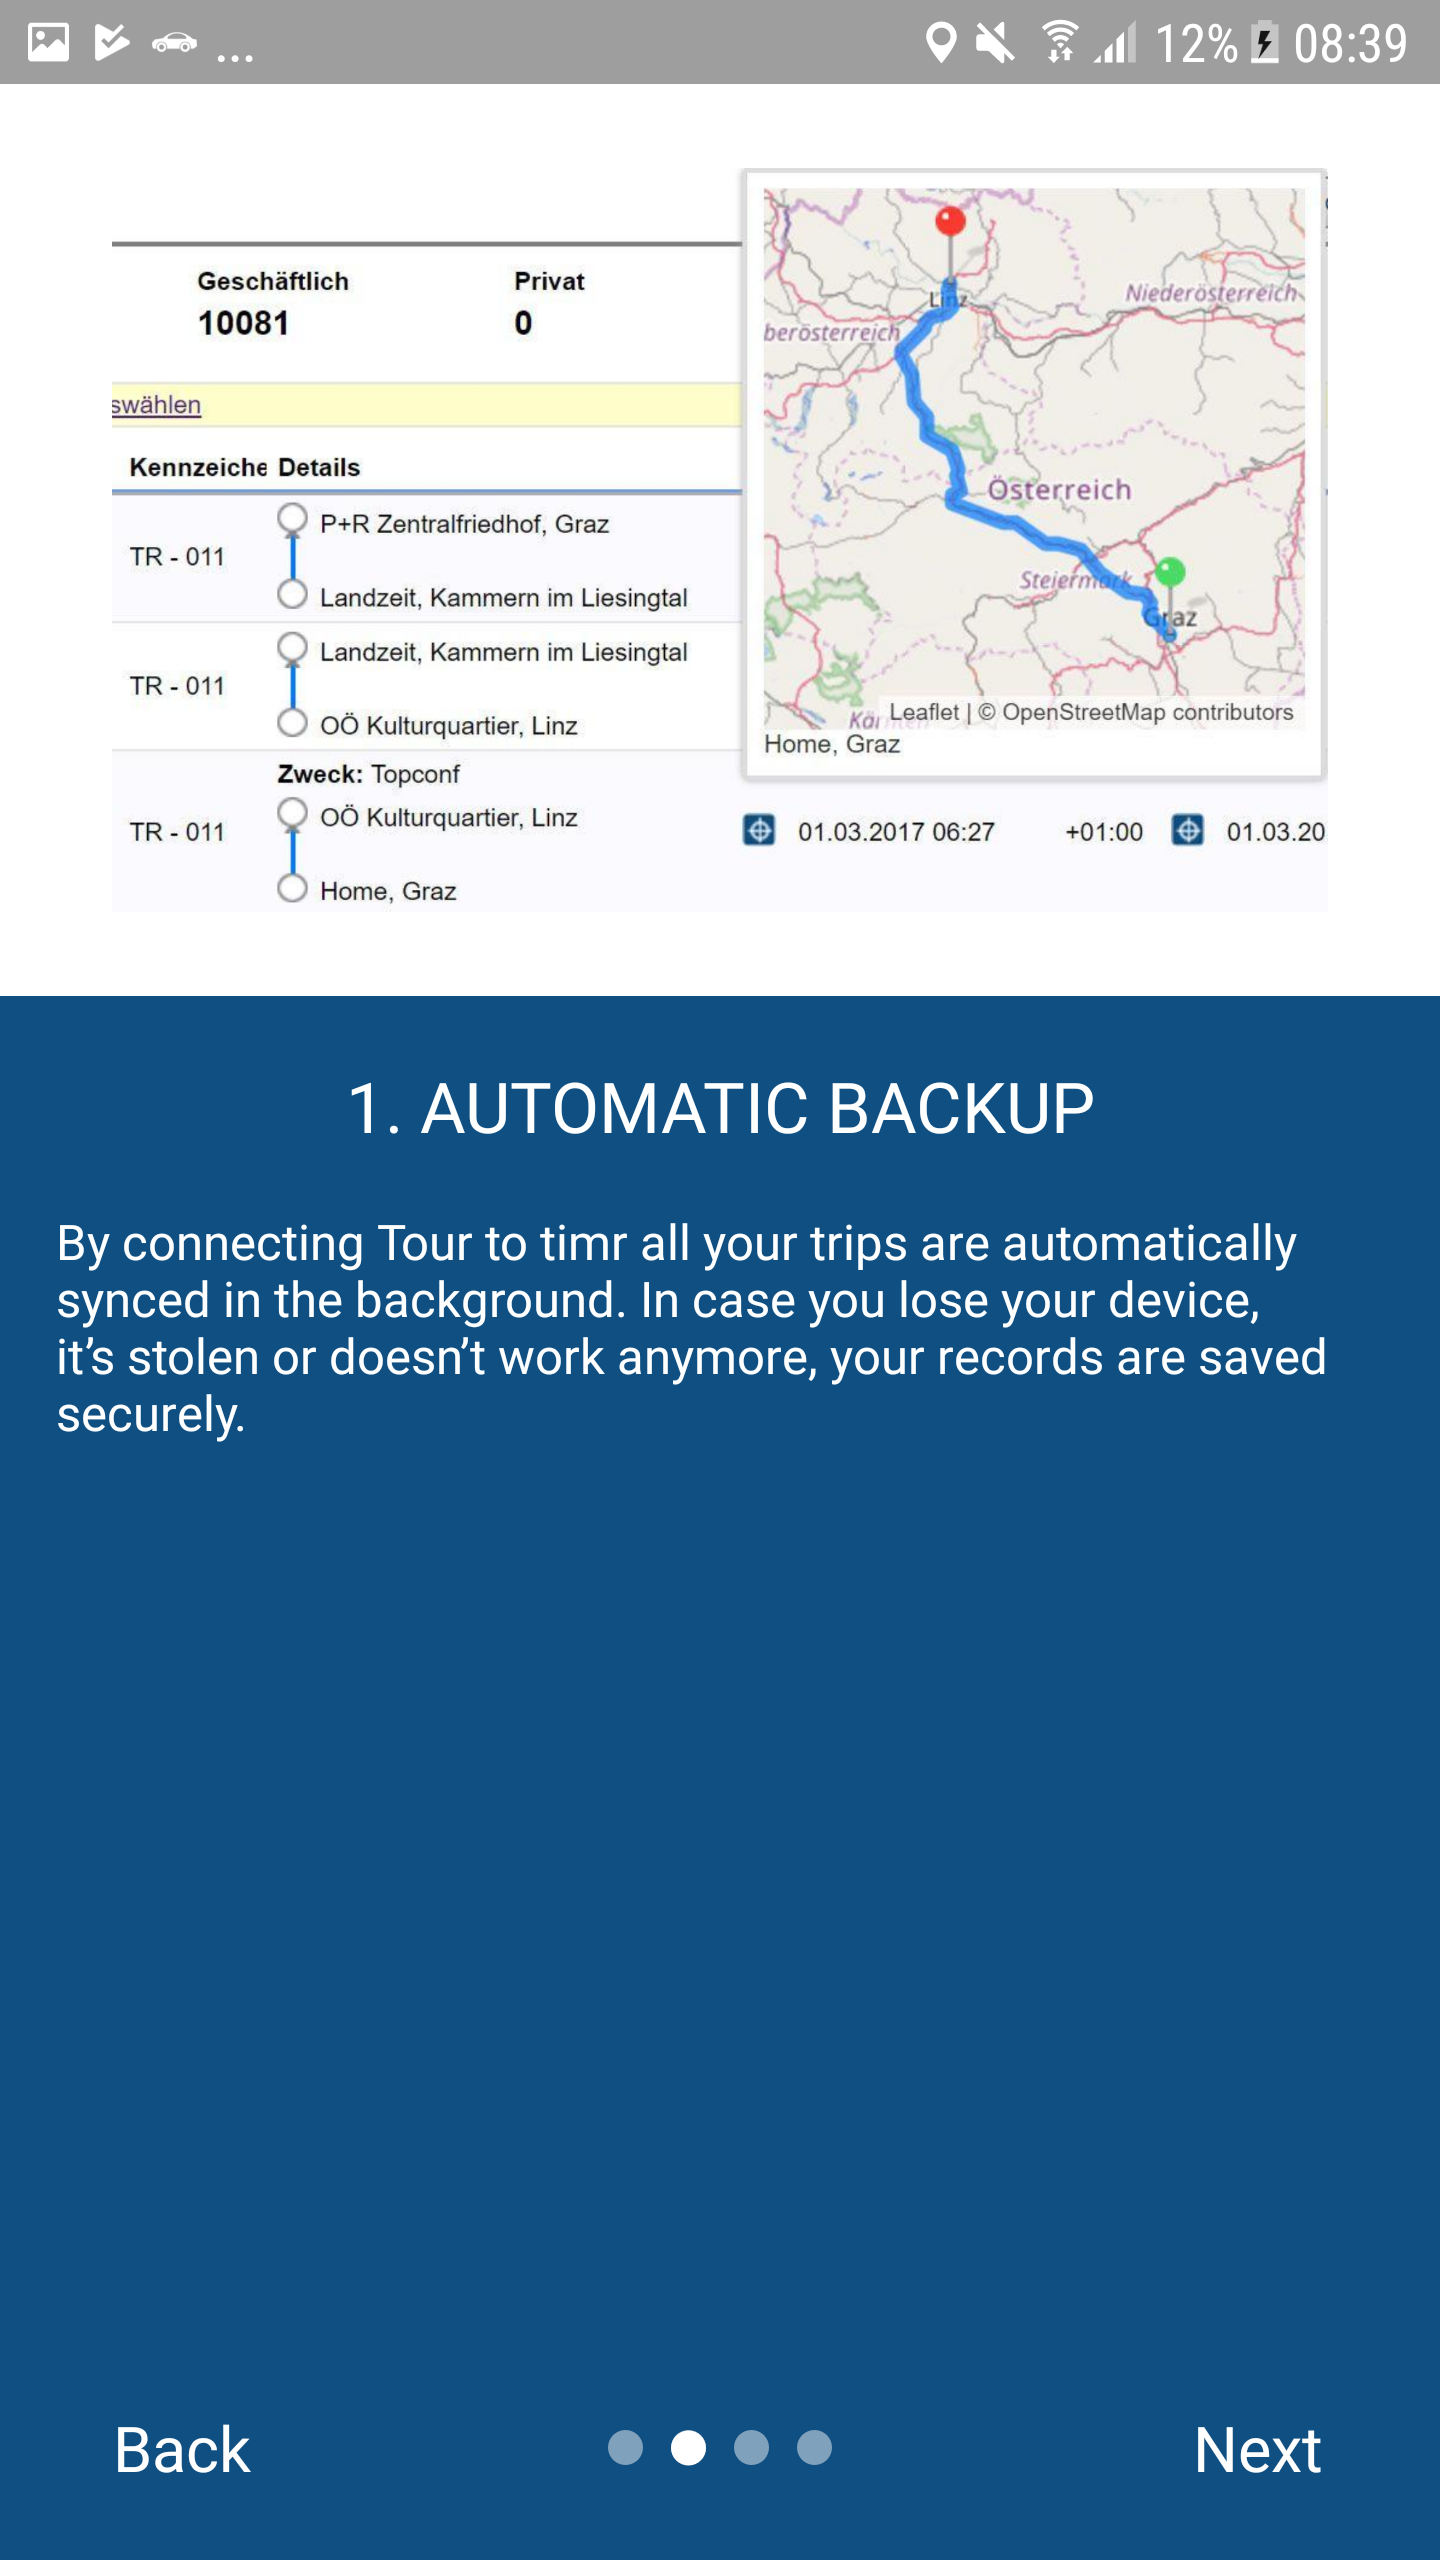
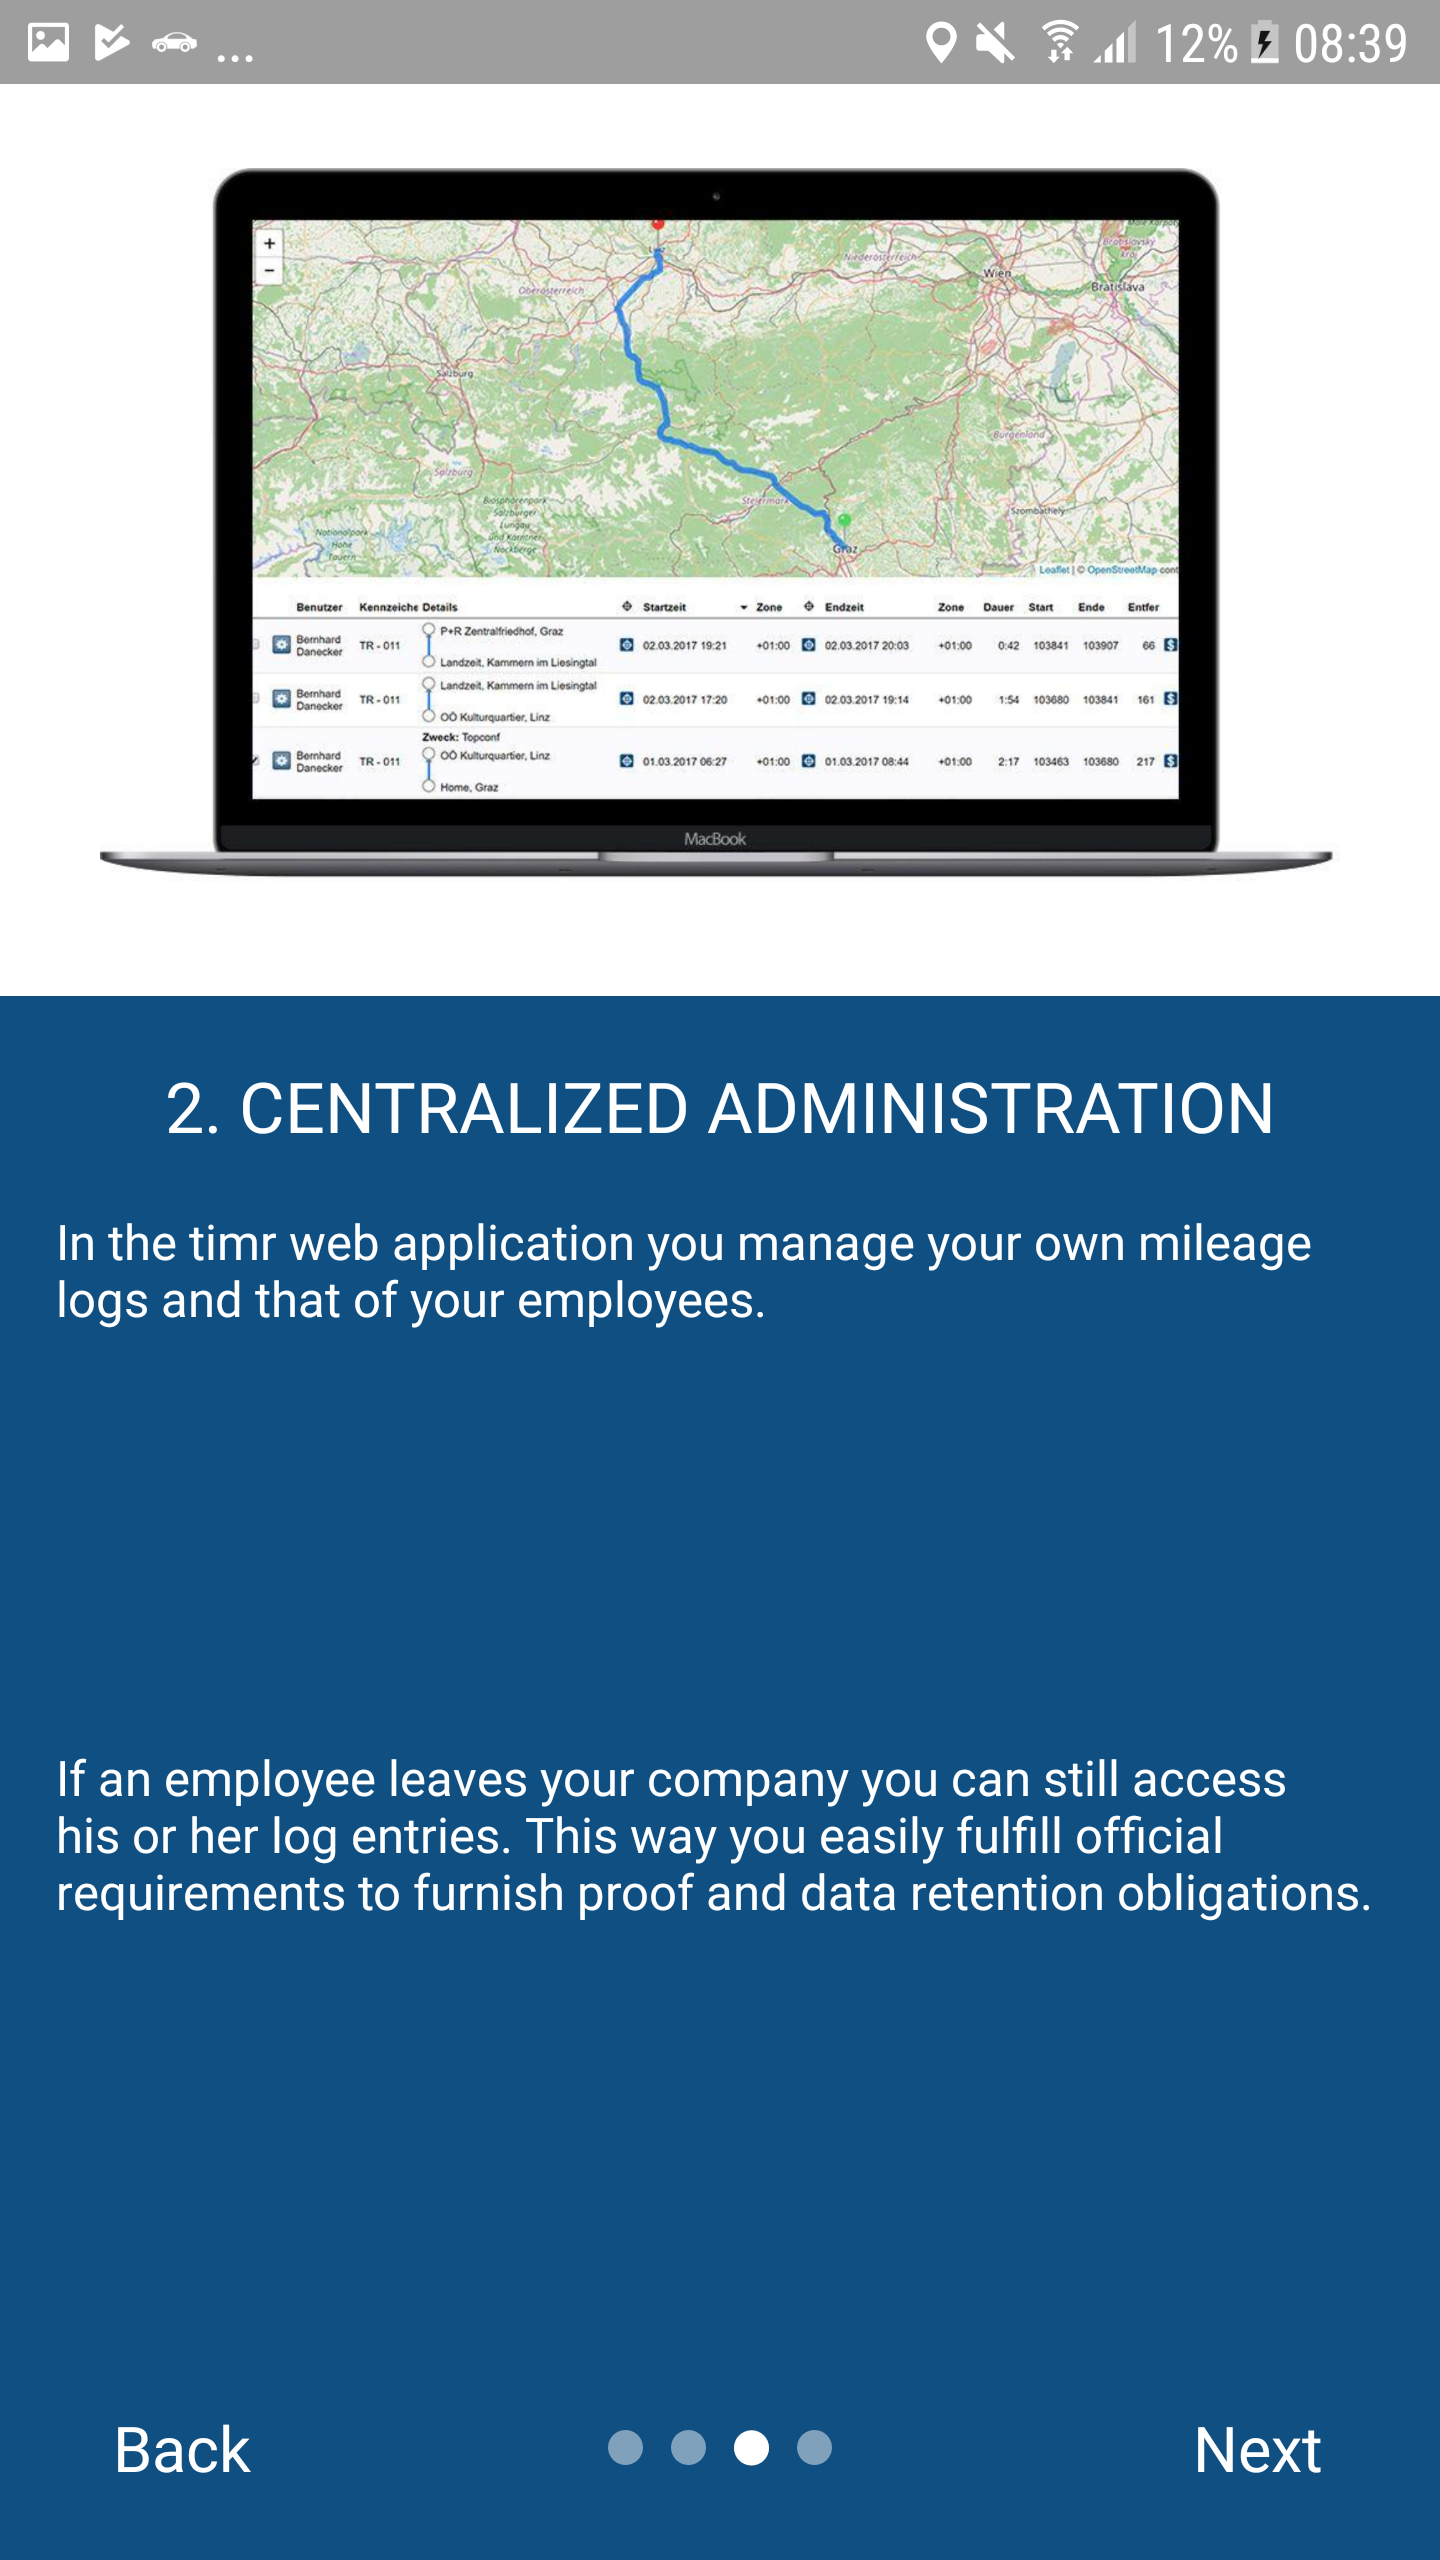
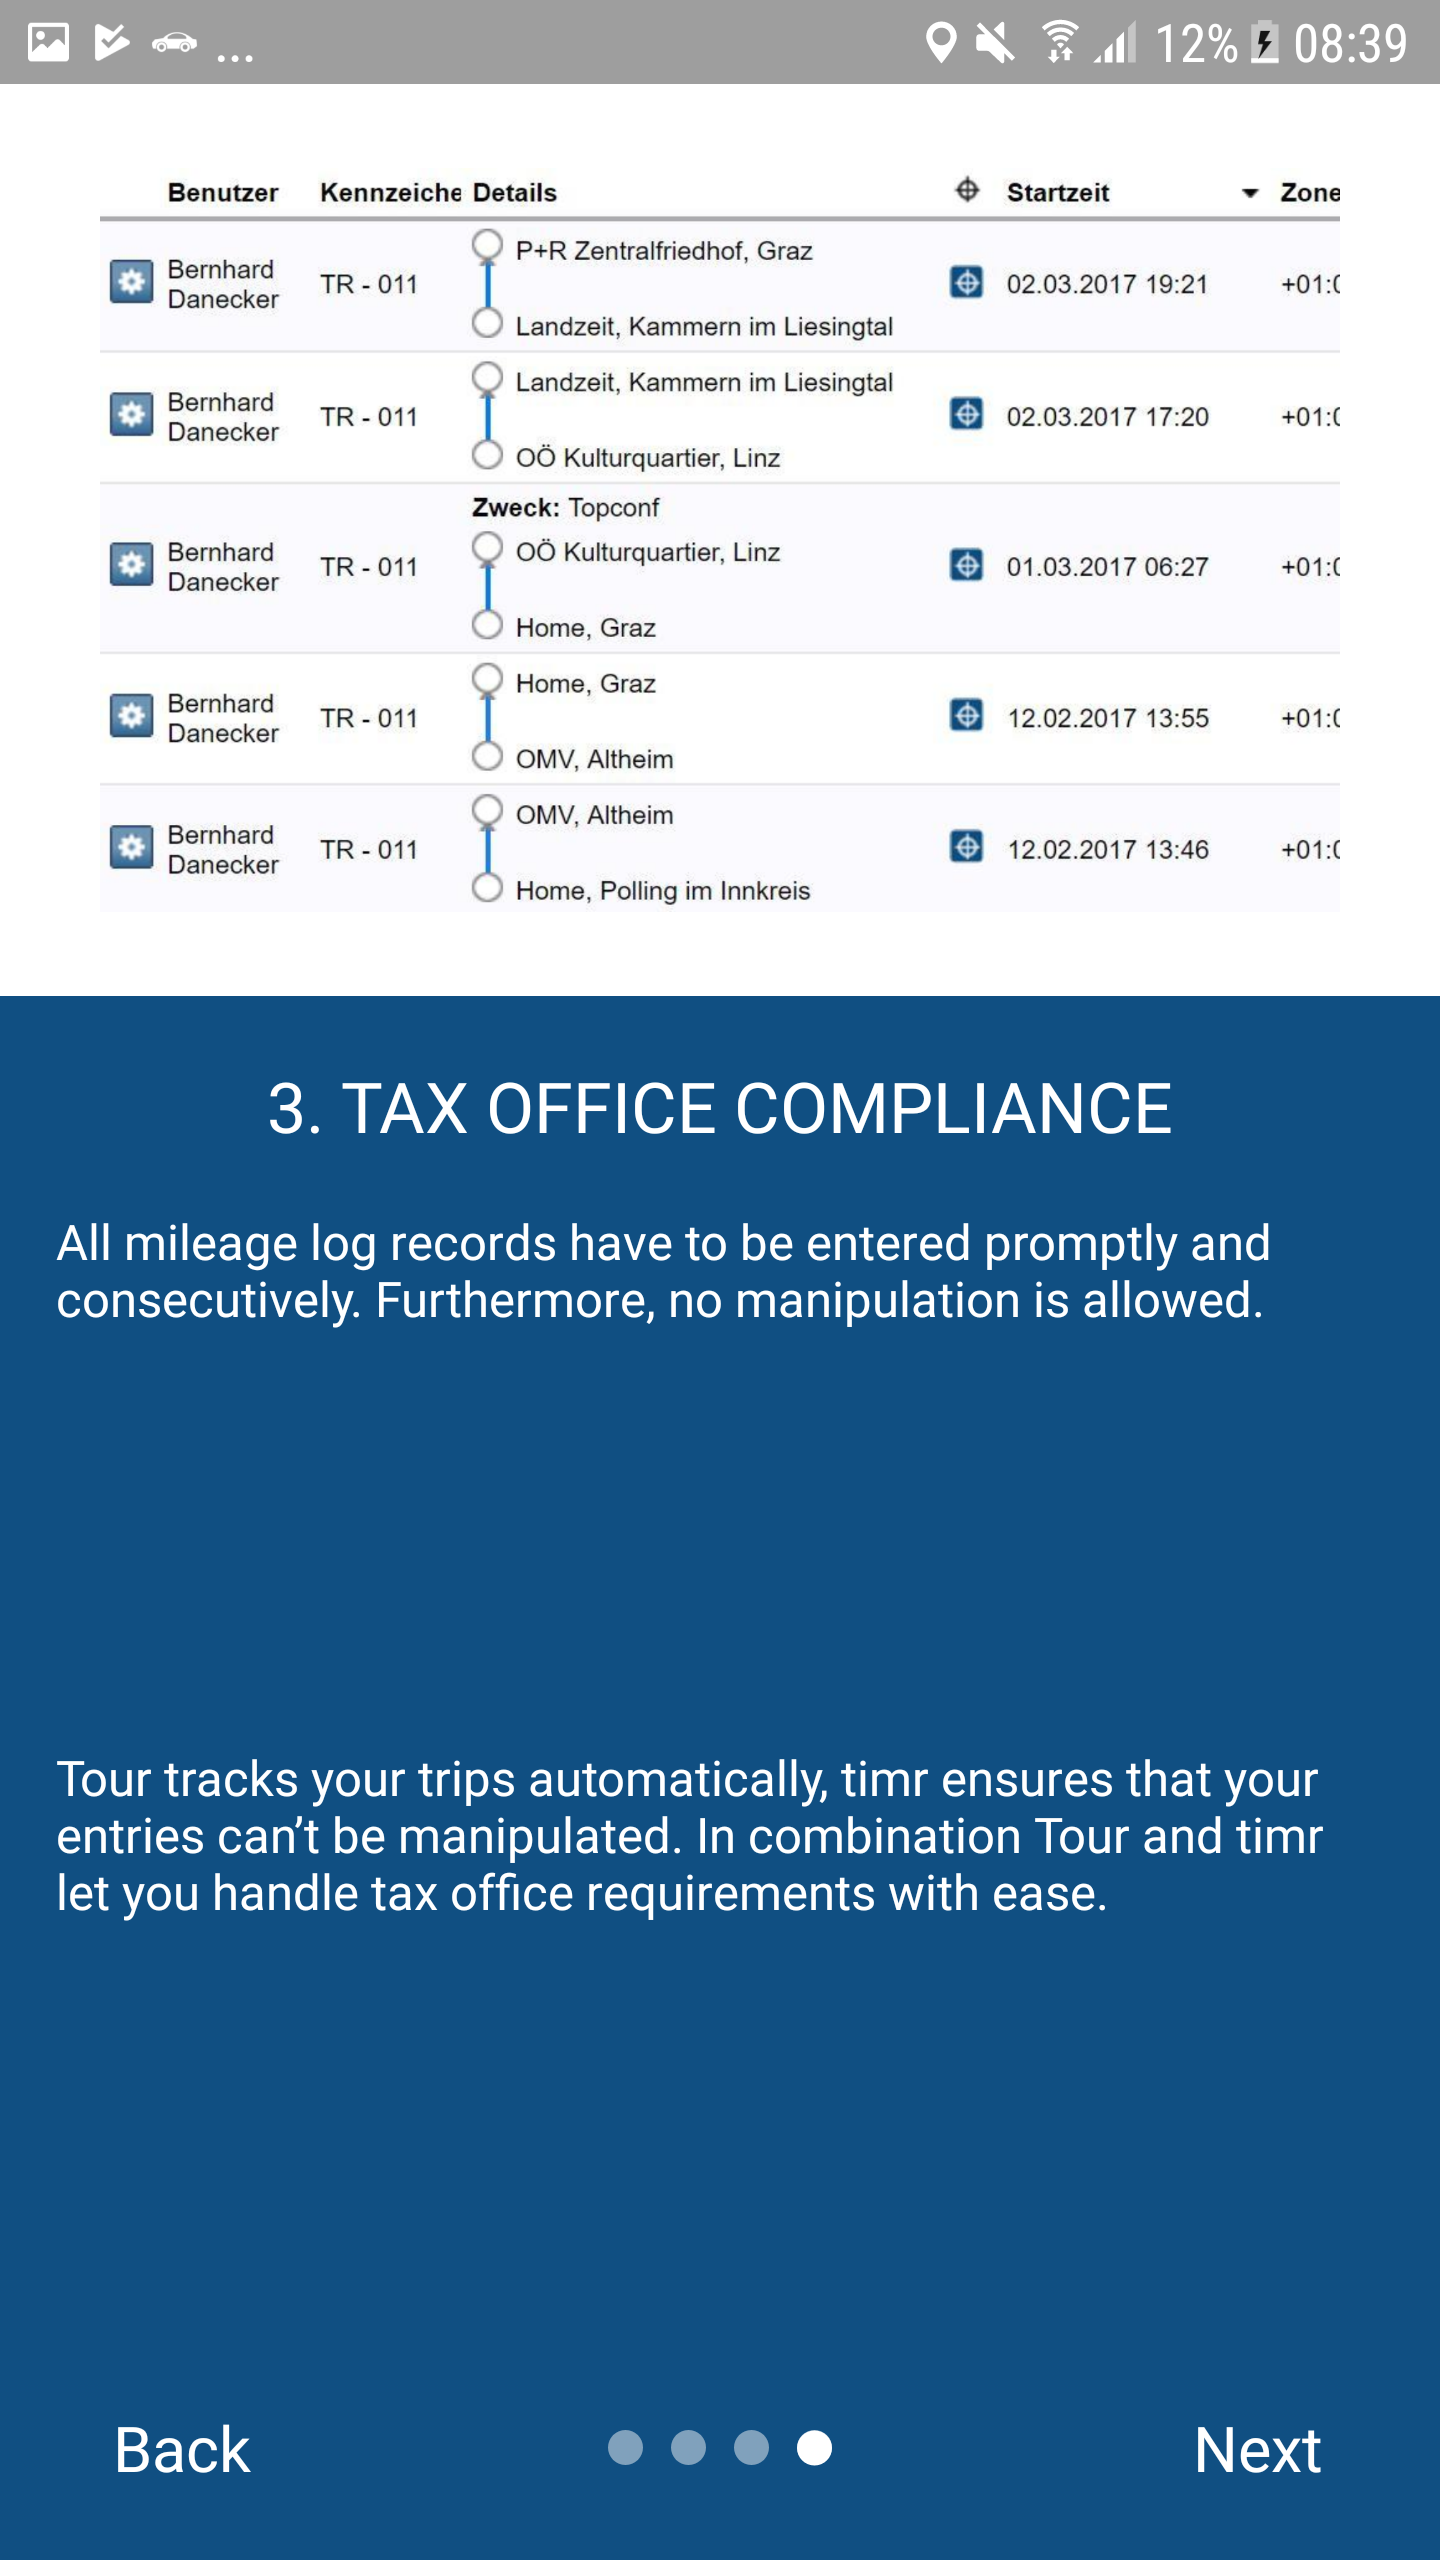
The Tour/timr Sync allows you to automatically save your trips. By connecting Tour with a timr account you can take advantage of the following functions:
- Reporting incl. GPS track
- Export trips (PDF, Excel, CSV)
- Secure cloud backup
The current Tour App which is available with the timr Cloud Sync, will be continuously improved and updated.
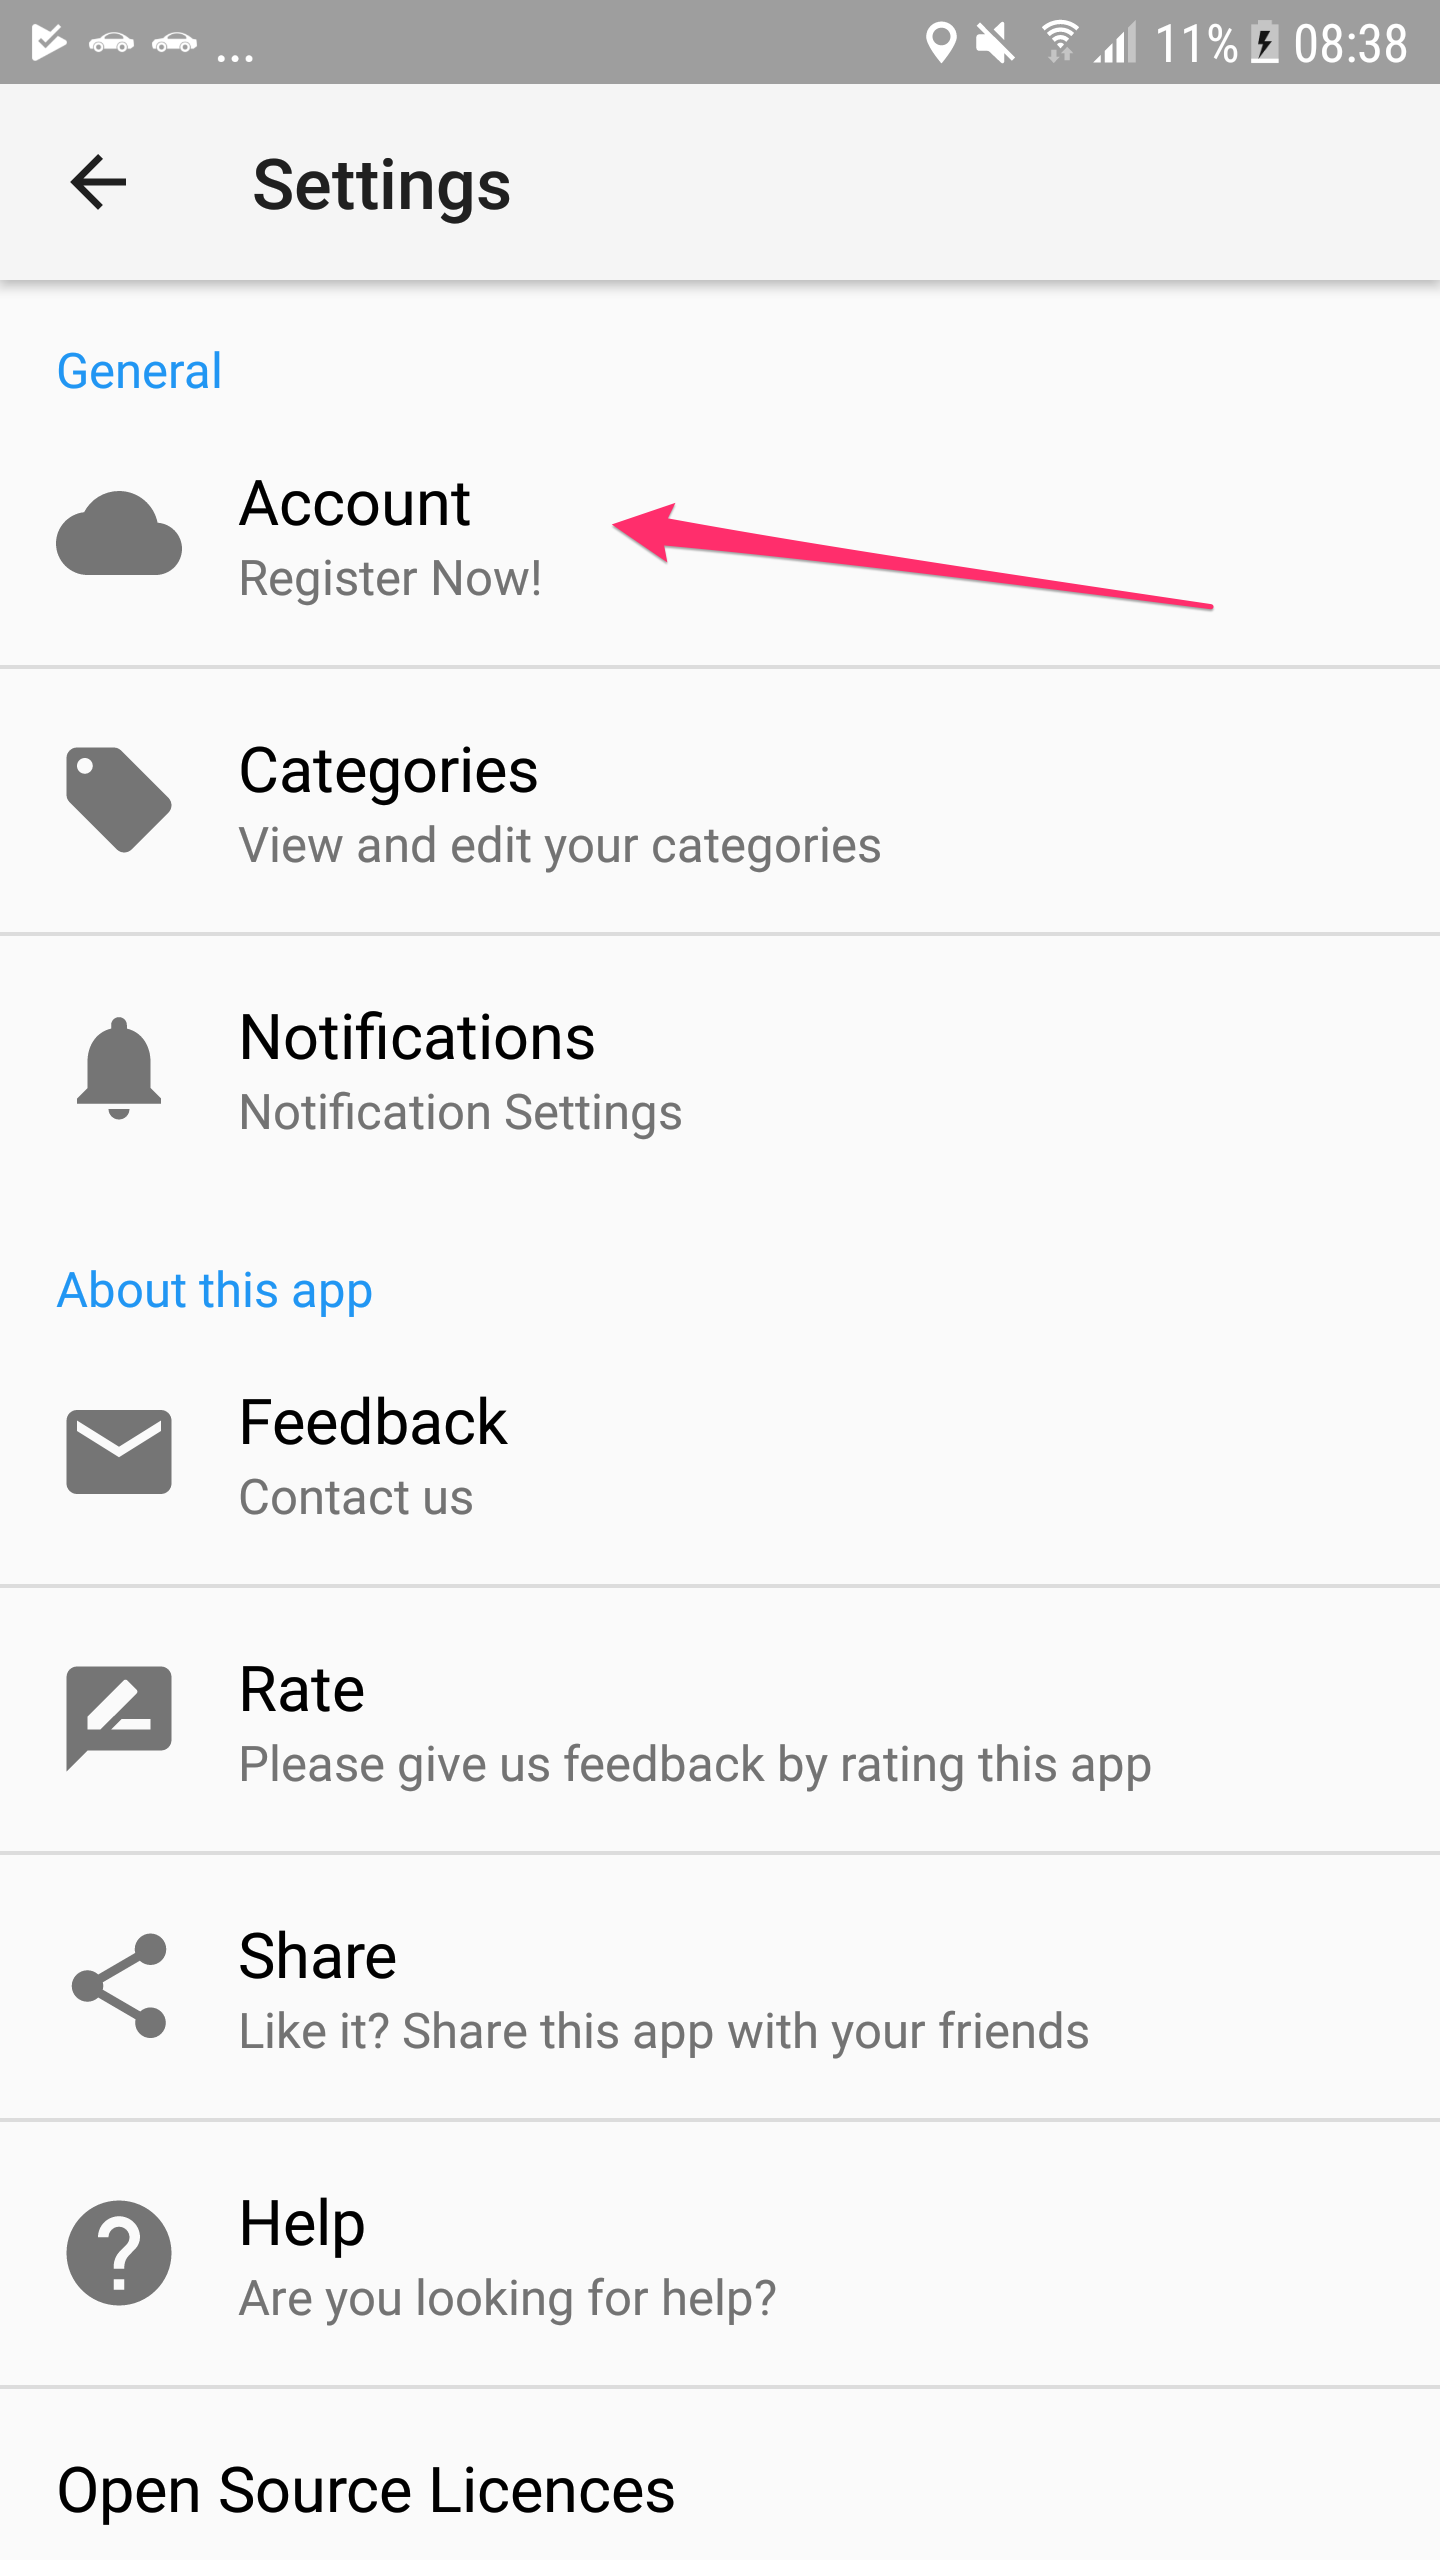
1. Create new timr account
In order to create a timr account go to the settings menu in Tour. There choose "Register Now!".
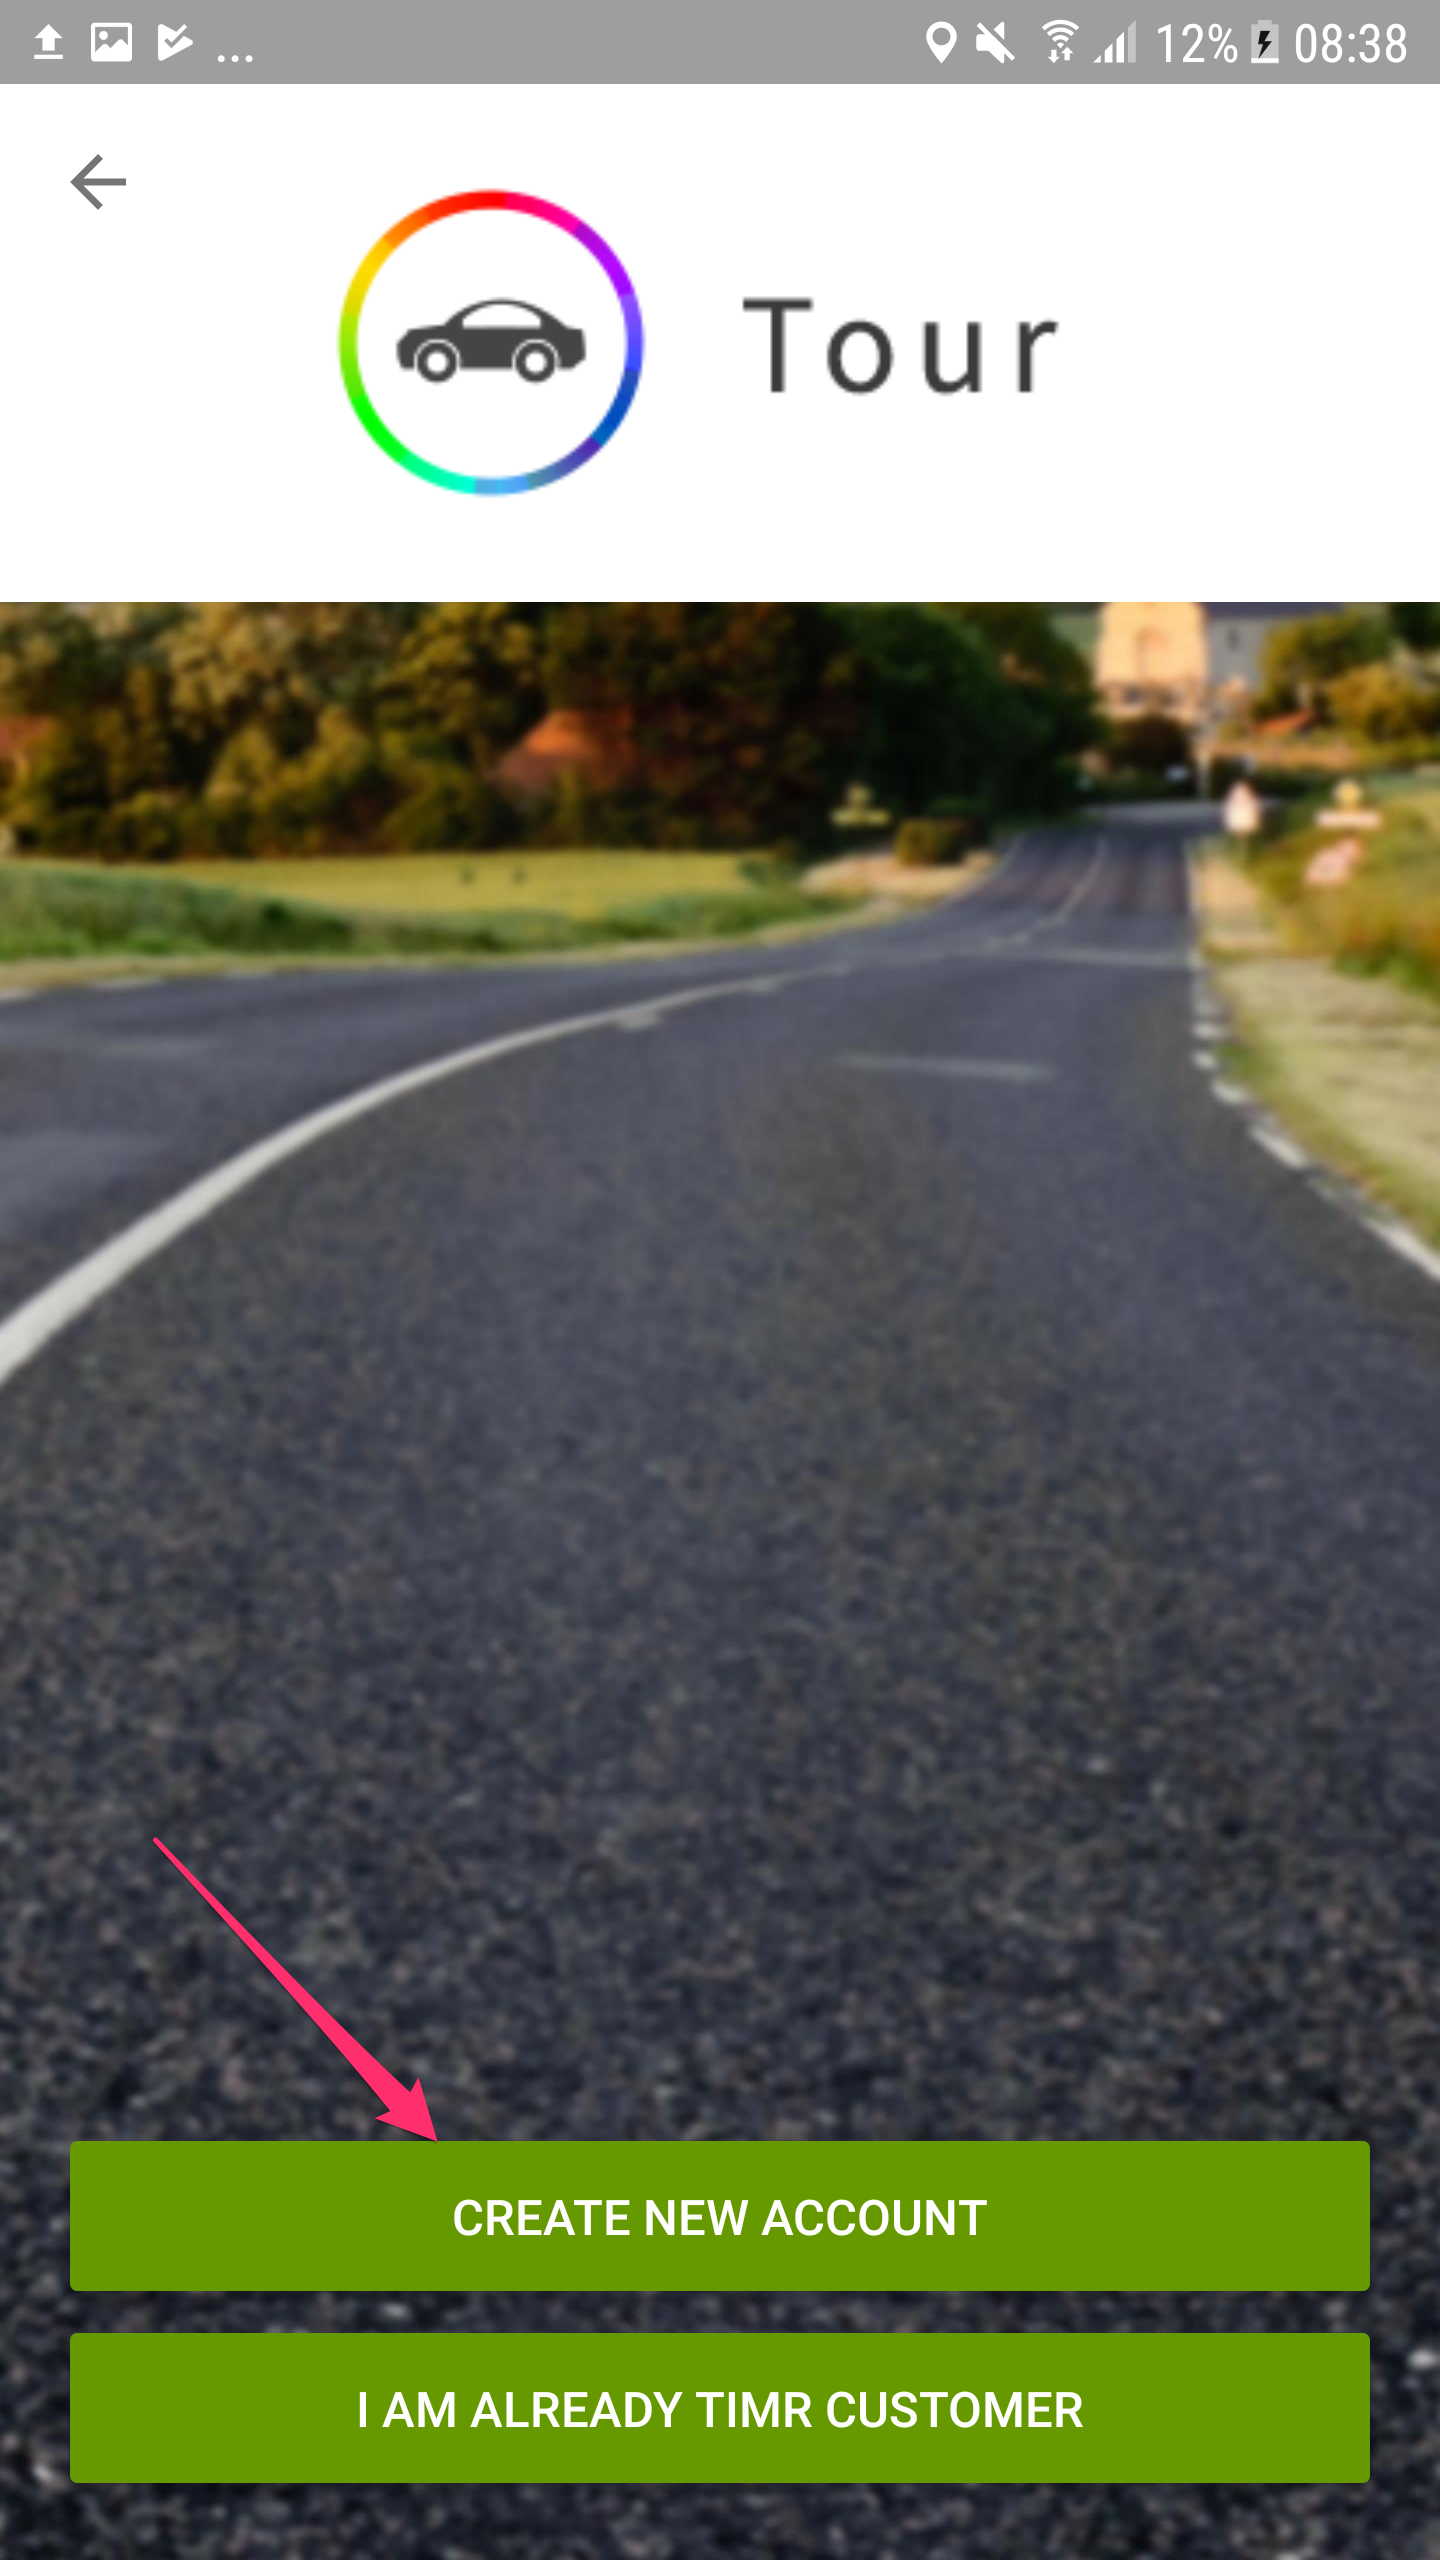
In the next step choose "Create a new account".
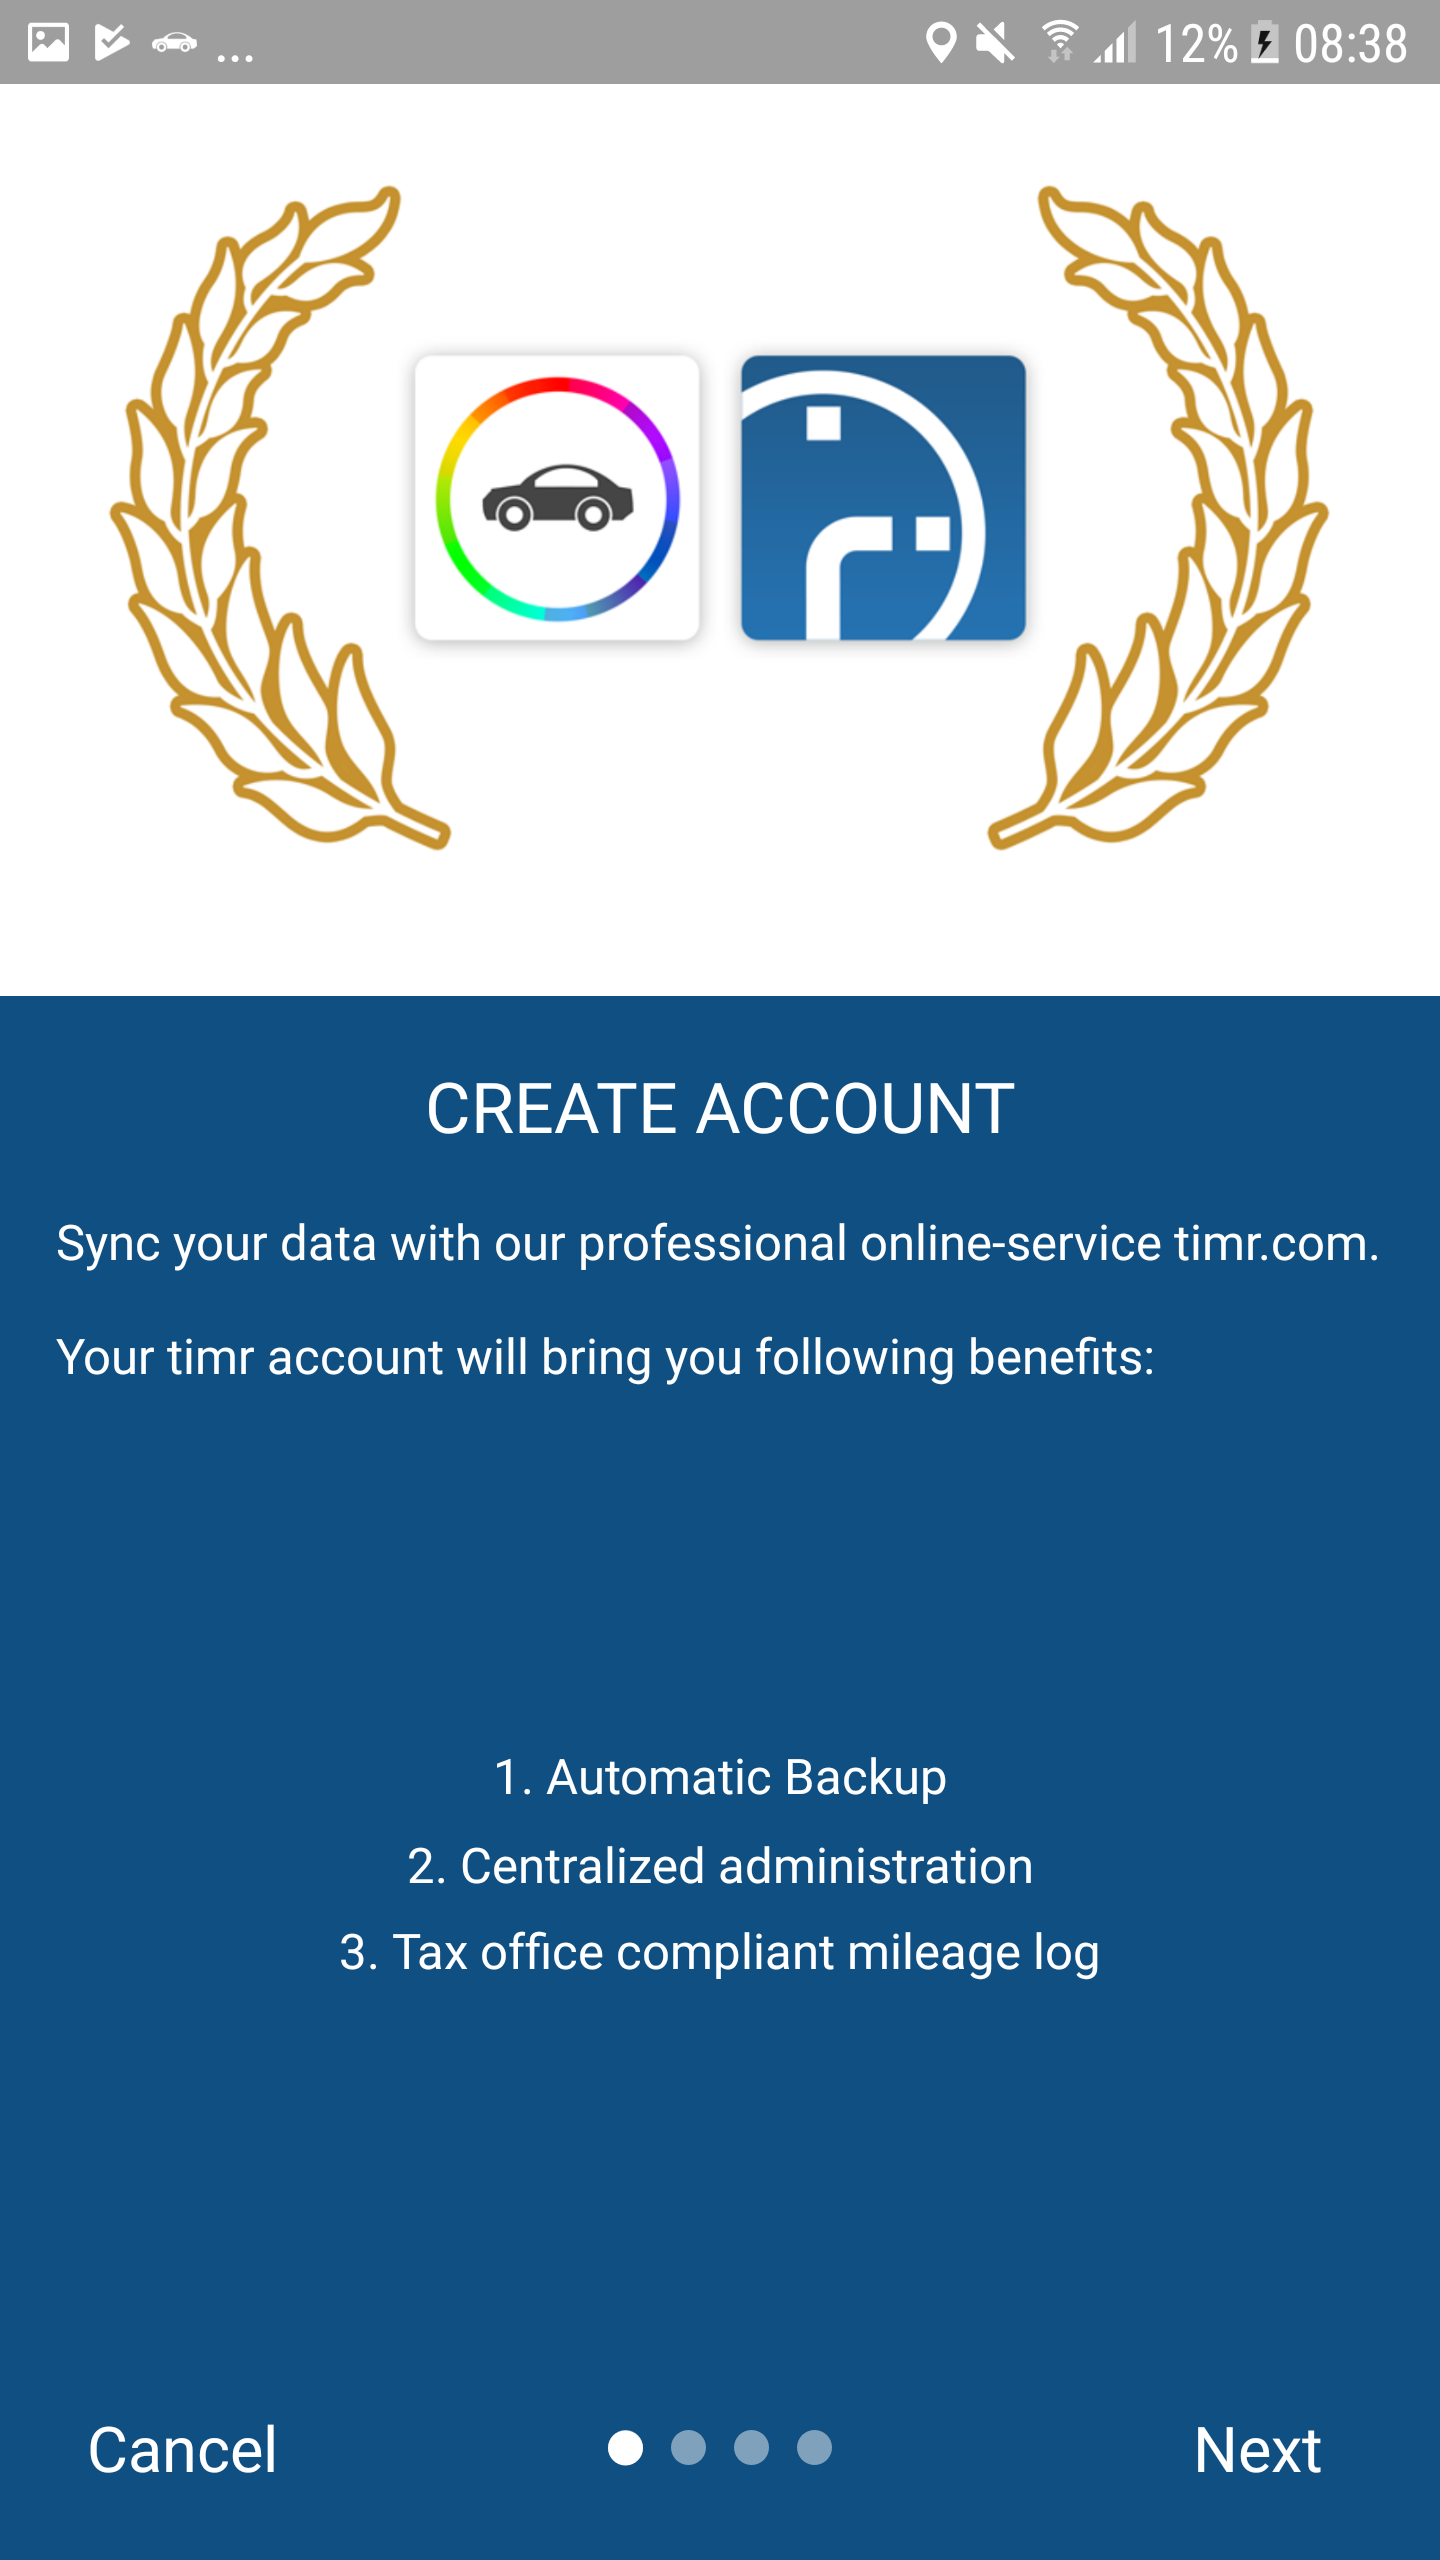
Now you'll get the most important infos regarding the timr Cloud Sync.
Afterwards you'll be asked for your name, your email addresse and you'll have to choose a password.
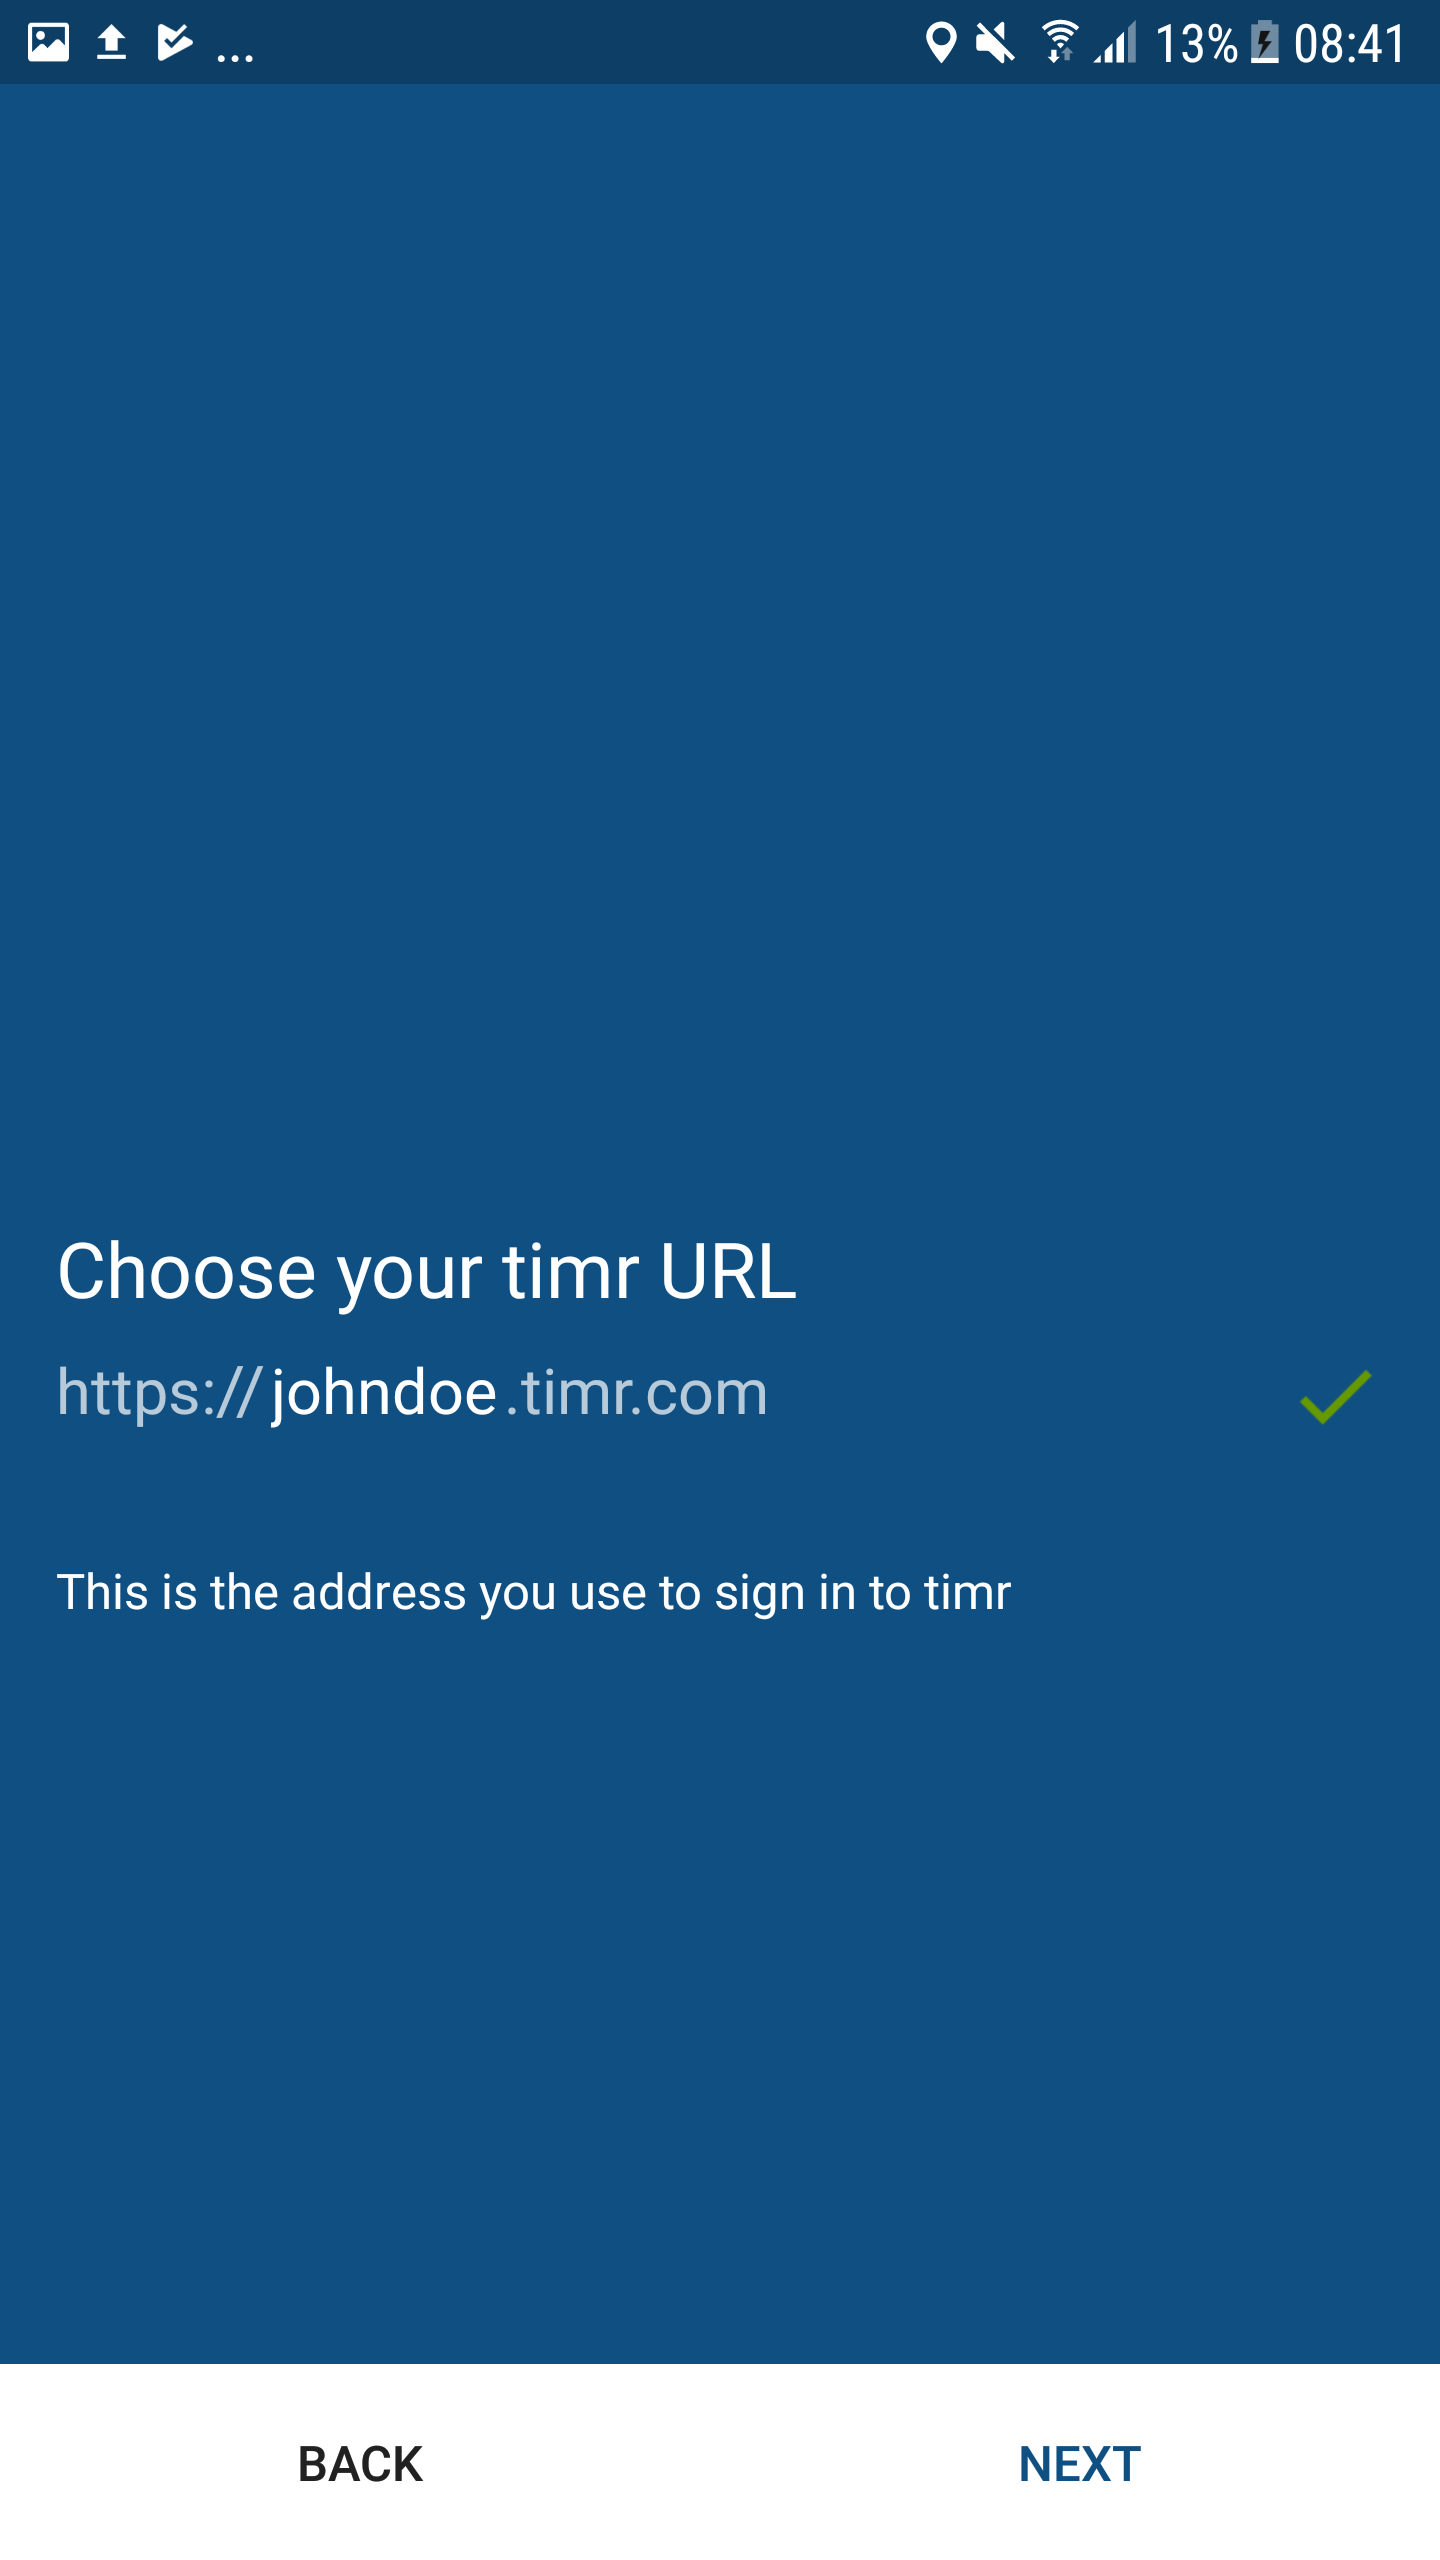
Now you have to choose your timr URL. In the future you'll access your timr account by using this web address.
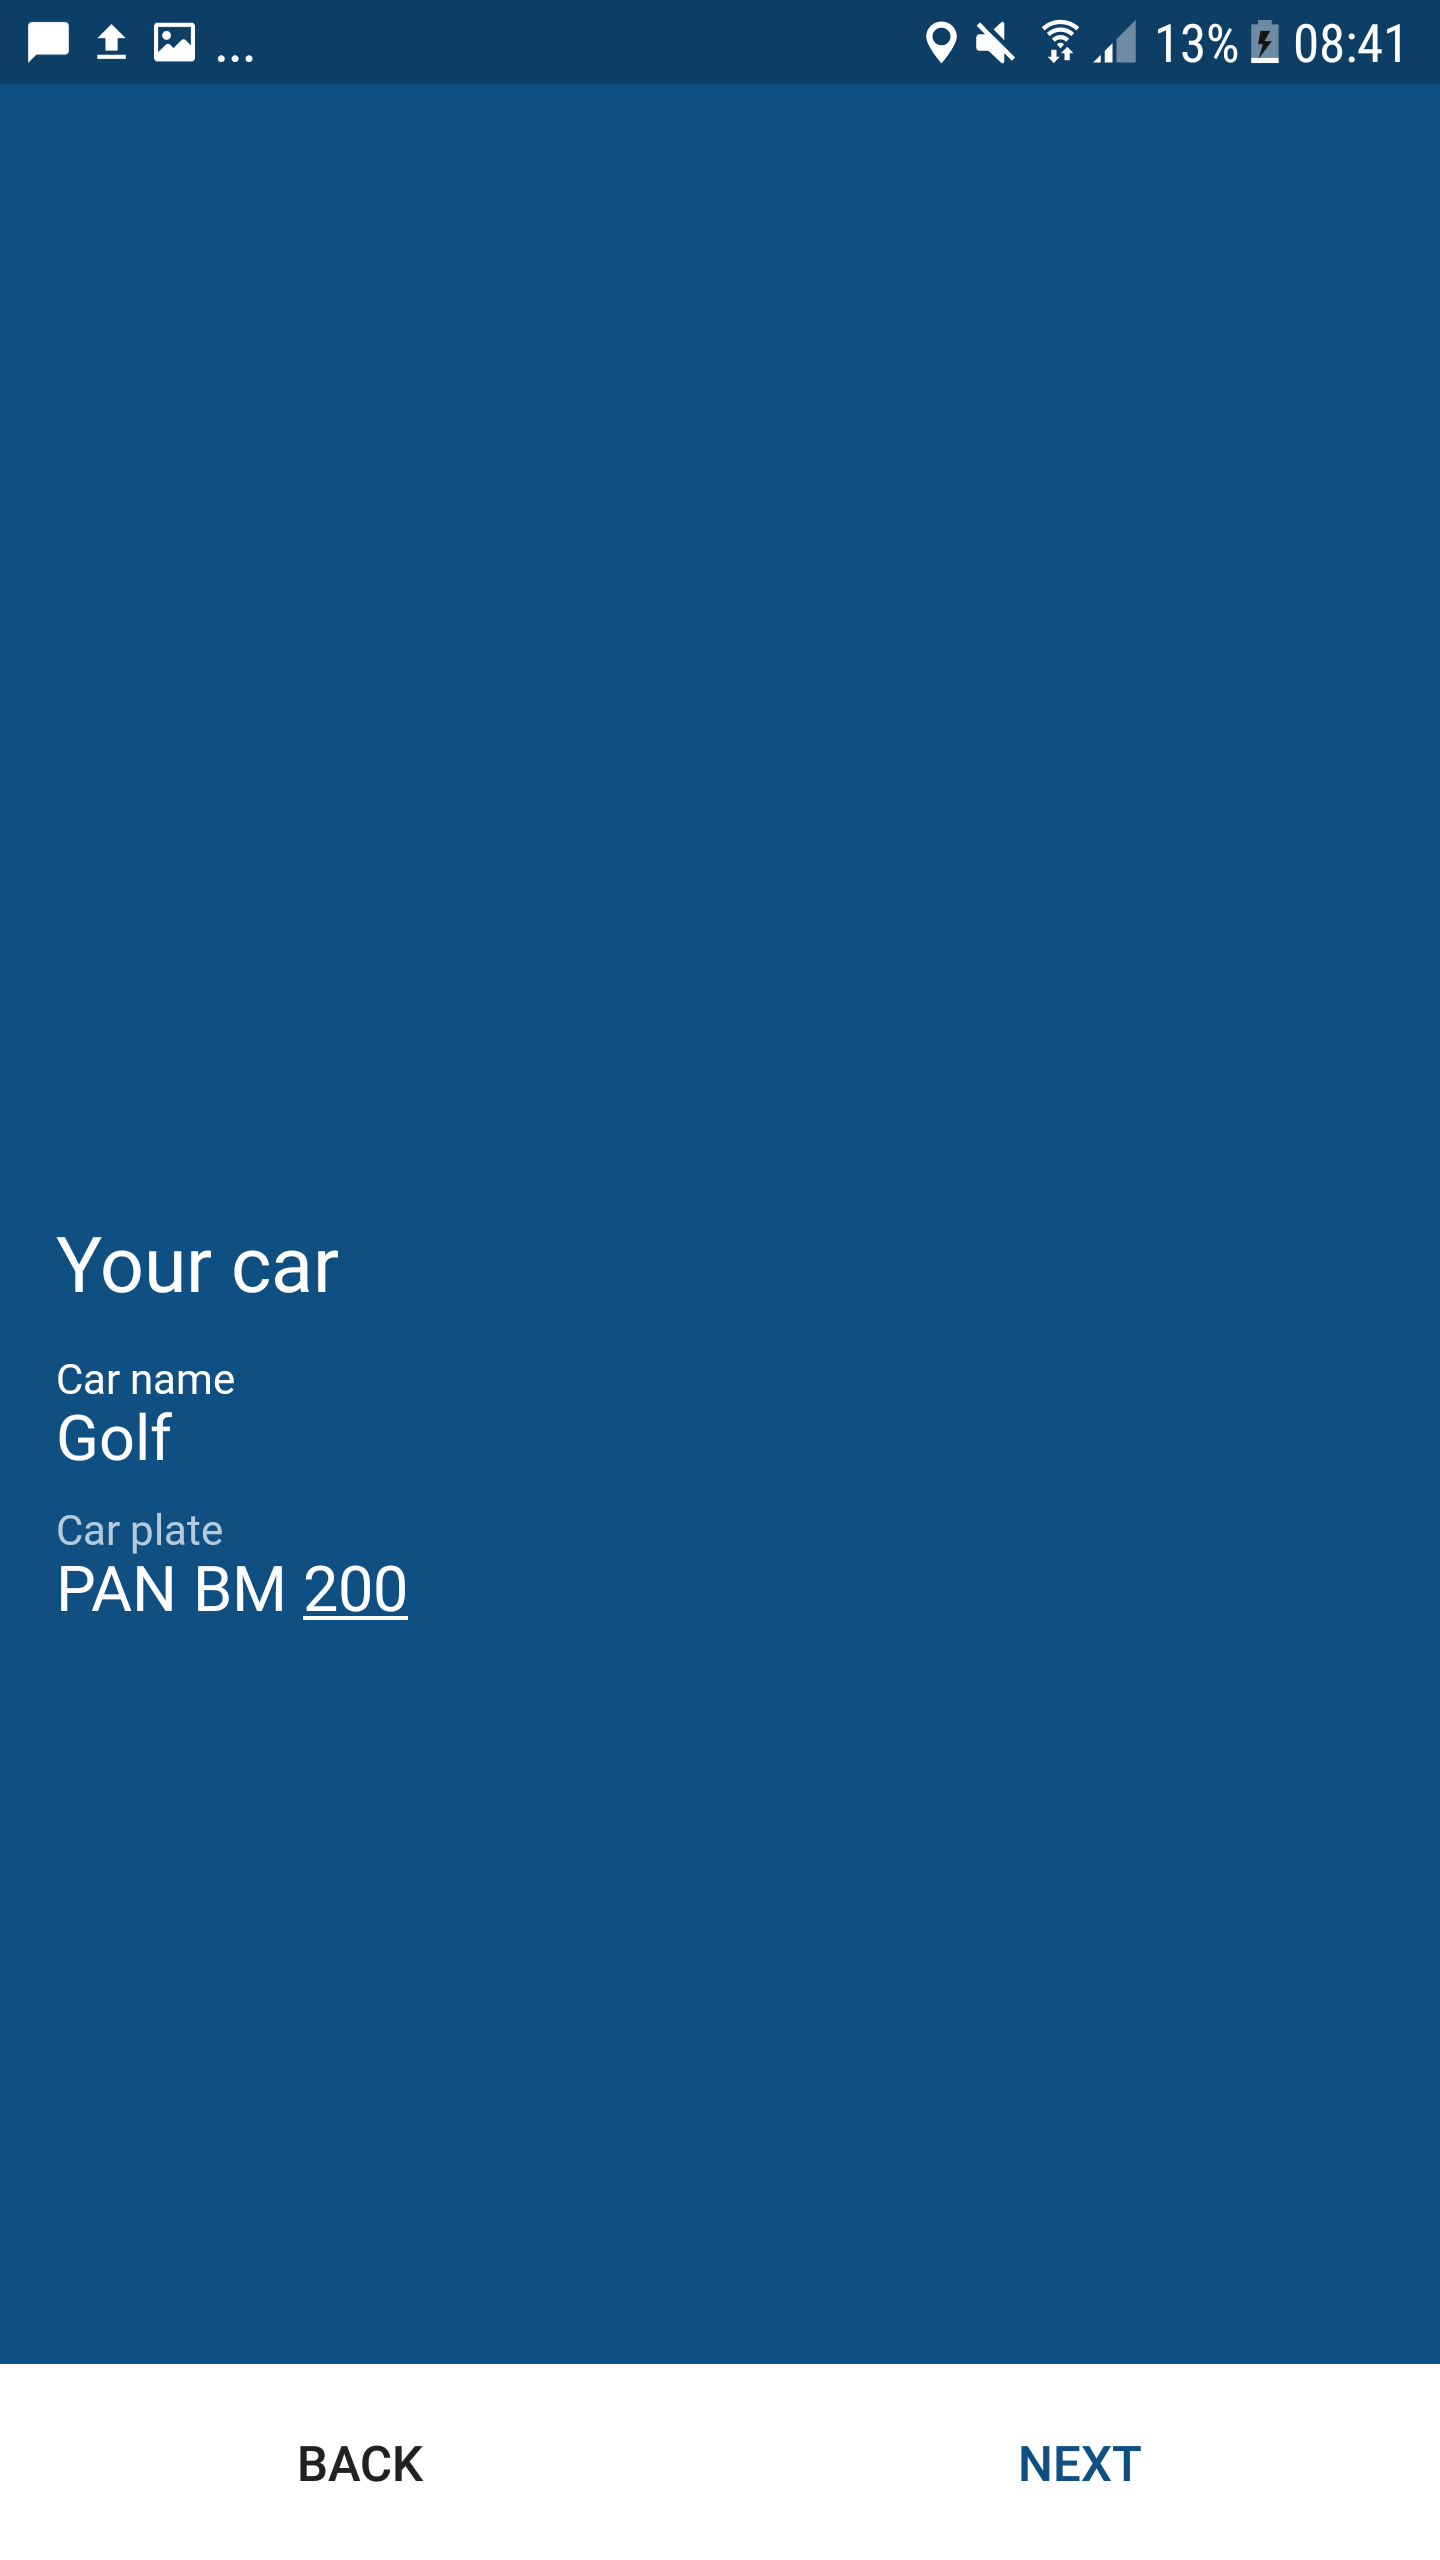
In the next step enter the name of your car and your car plate.
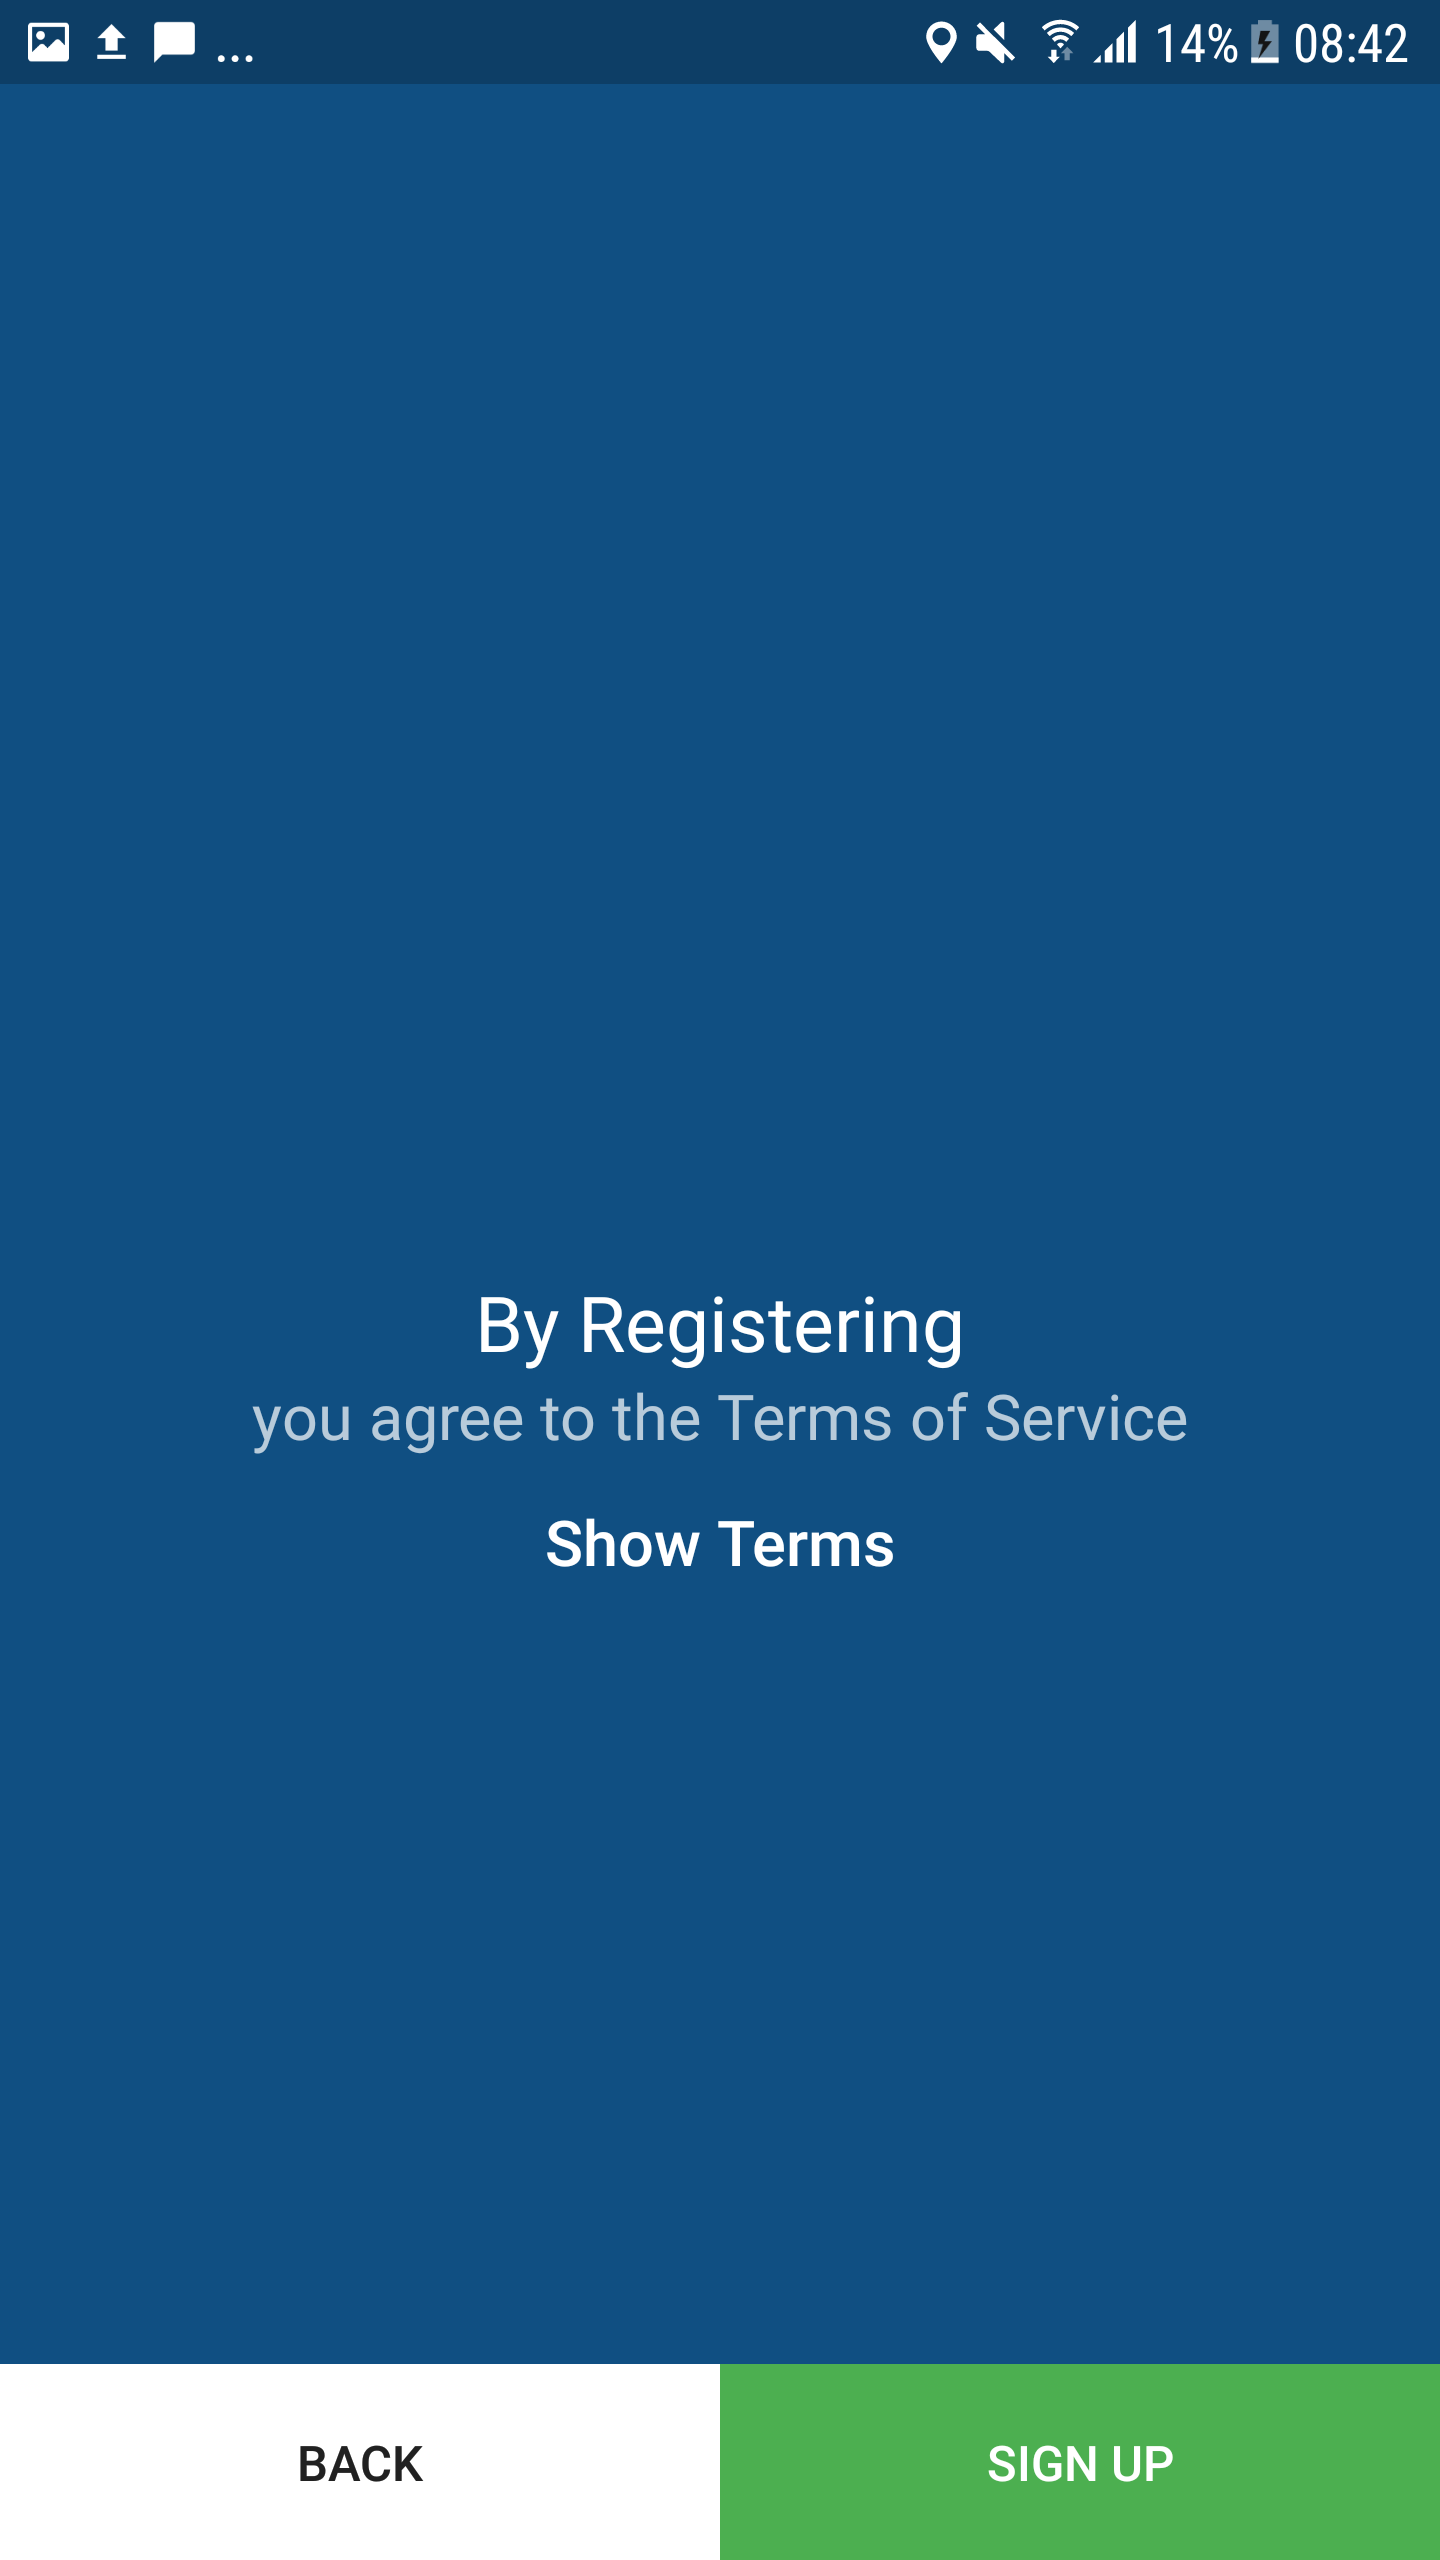
In order to create your account now accept the terms of service.
2. timr Cloud Sync settings
By connecting Tour to the timr cloud backend the trips you track with Tour are automatically synced to timr. Now you'll define the most important settings.
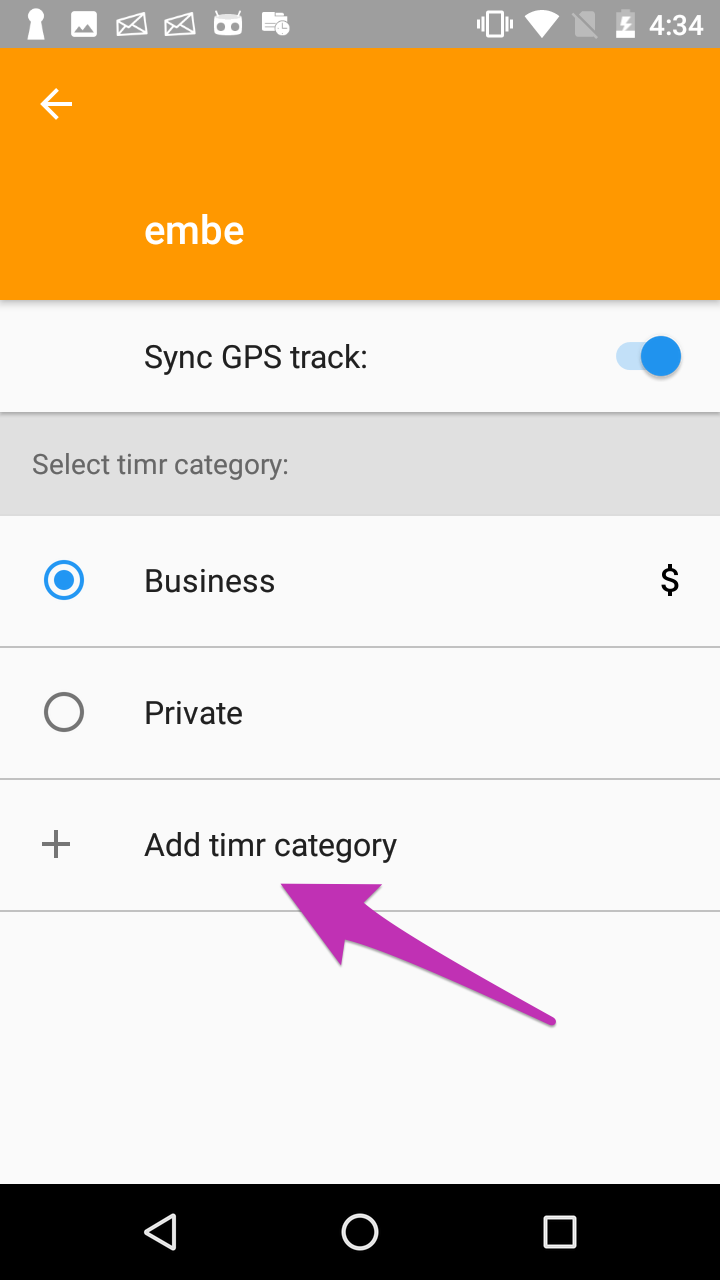
First connect your Tour categories with the timr categories.
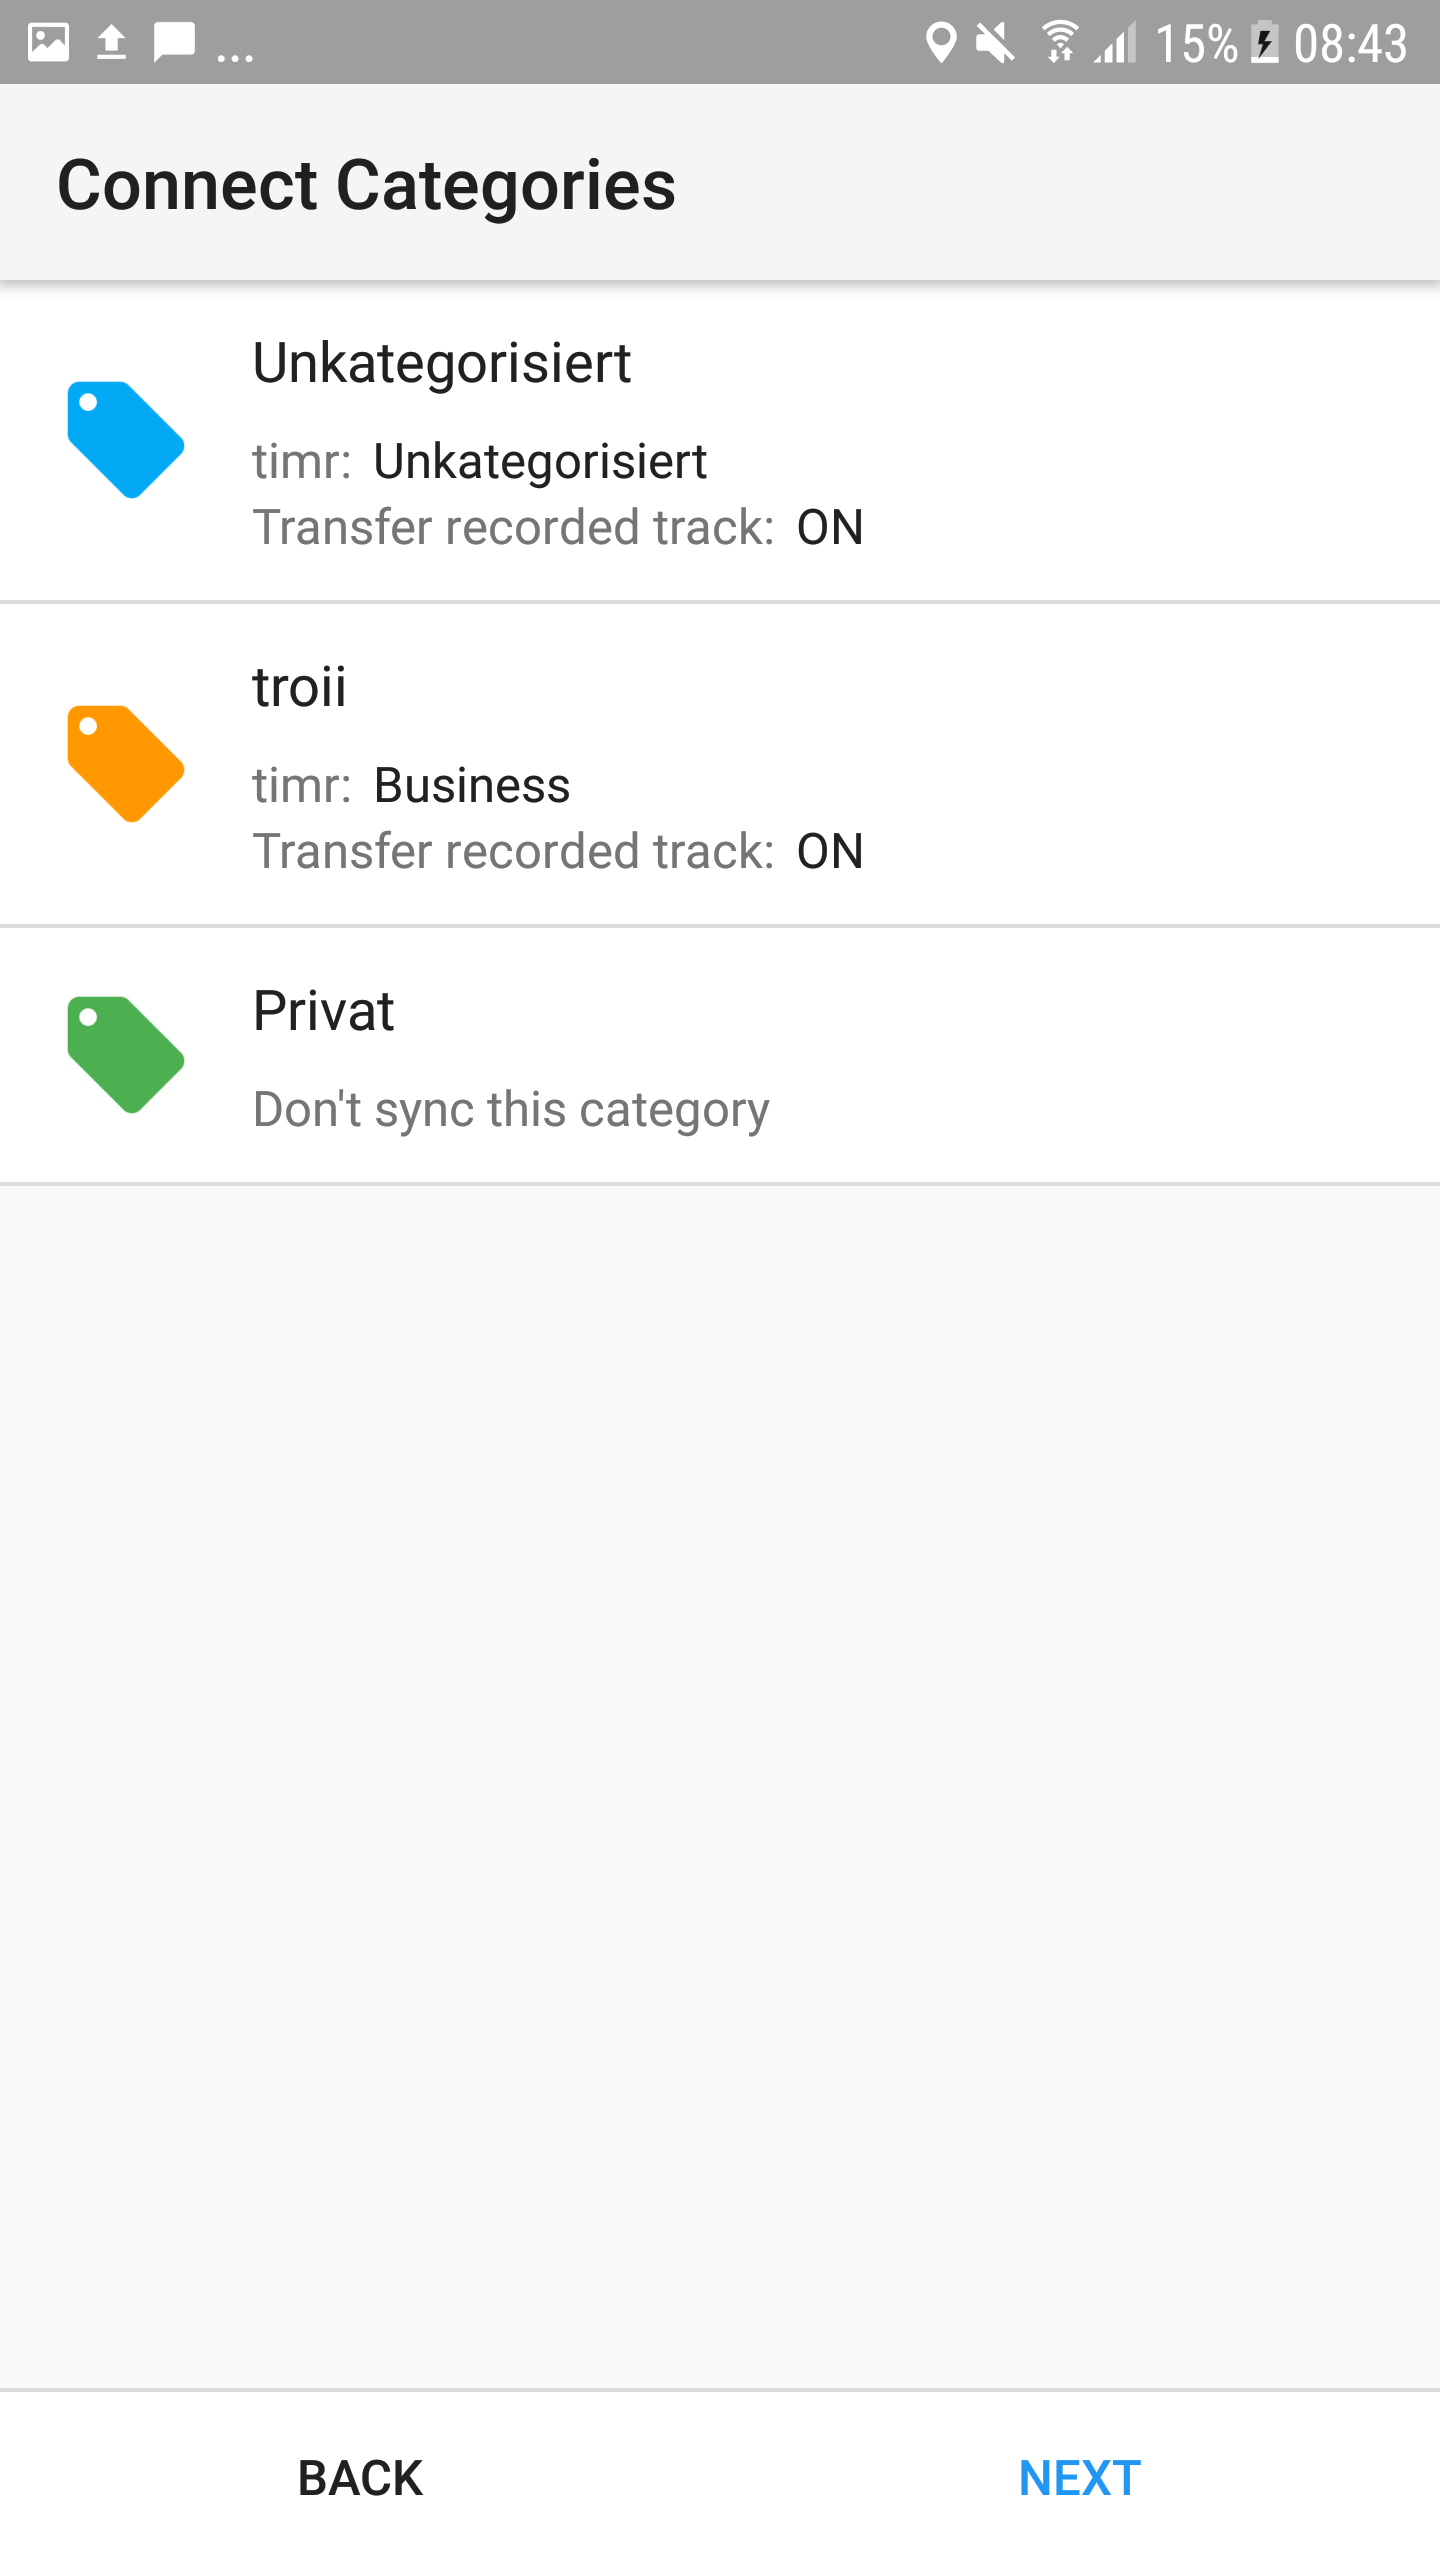
In timr you have the categories "Private" and "Business". When you connect your Tour App with timr you can choose if you want to assign your Tour categories to one of the two existing timr categories or if you want to create a new timr category out of your Tour category.
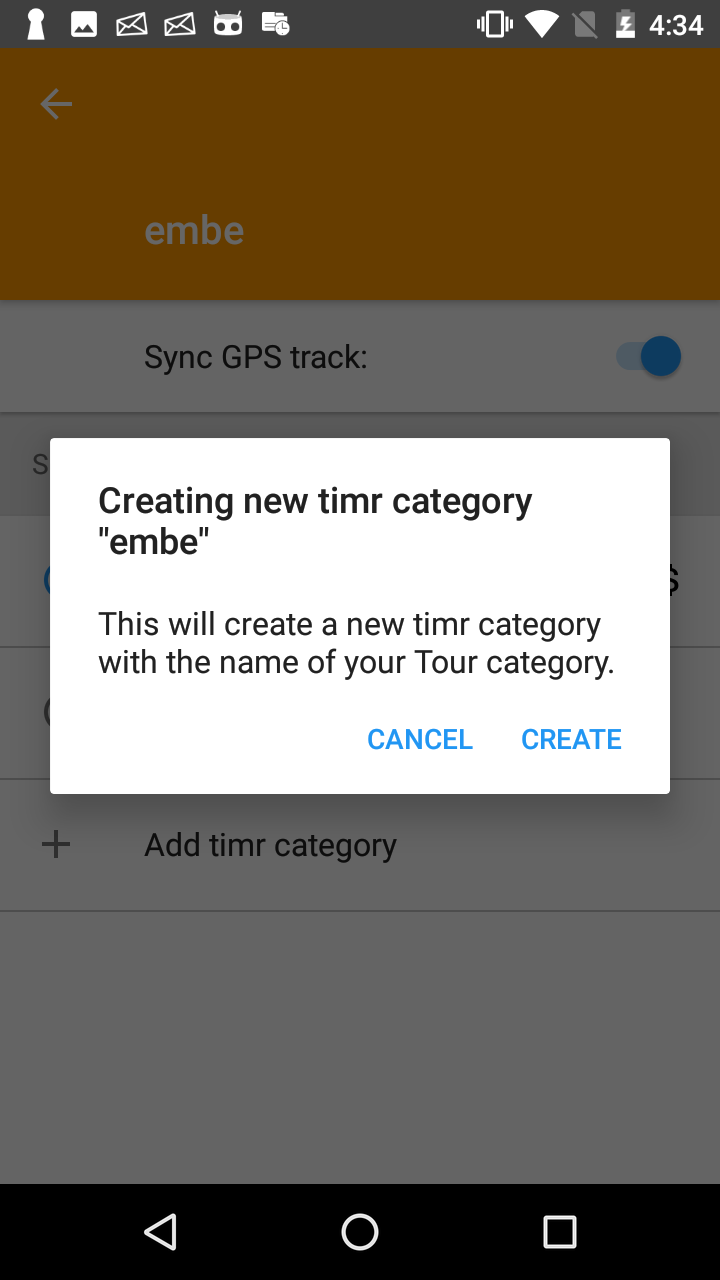
Note: you can't create these new categories in timr.
You can also create a new timr category based on the existing Tour category.
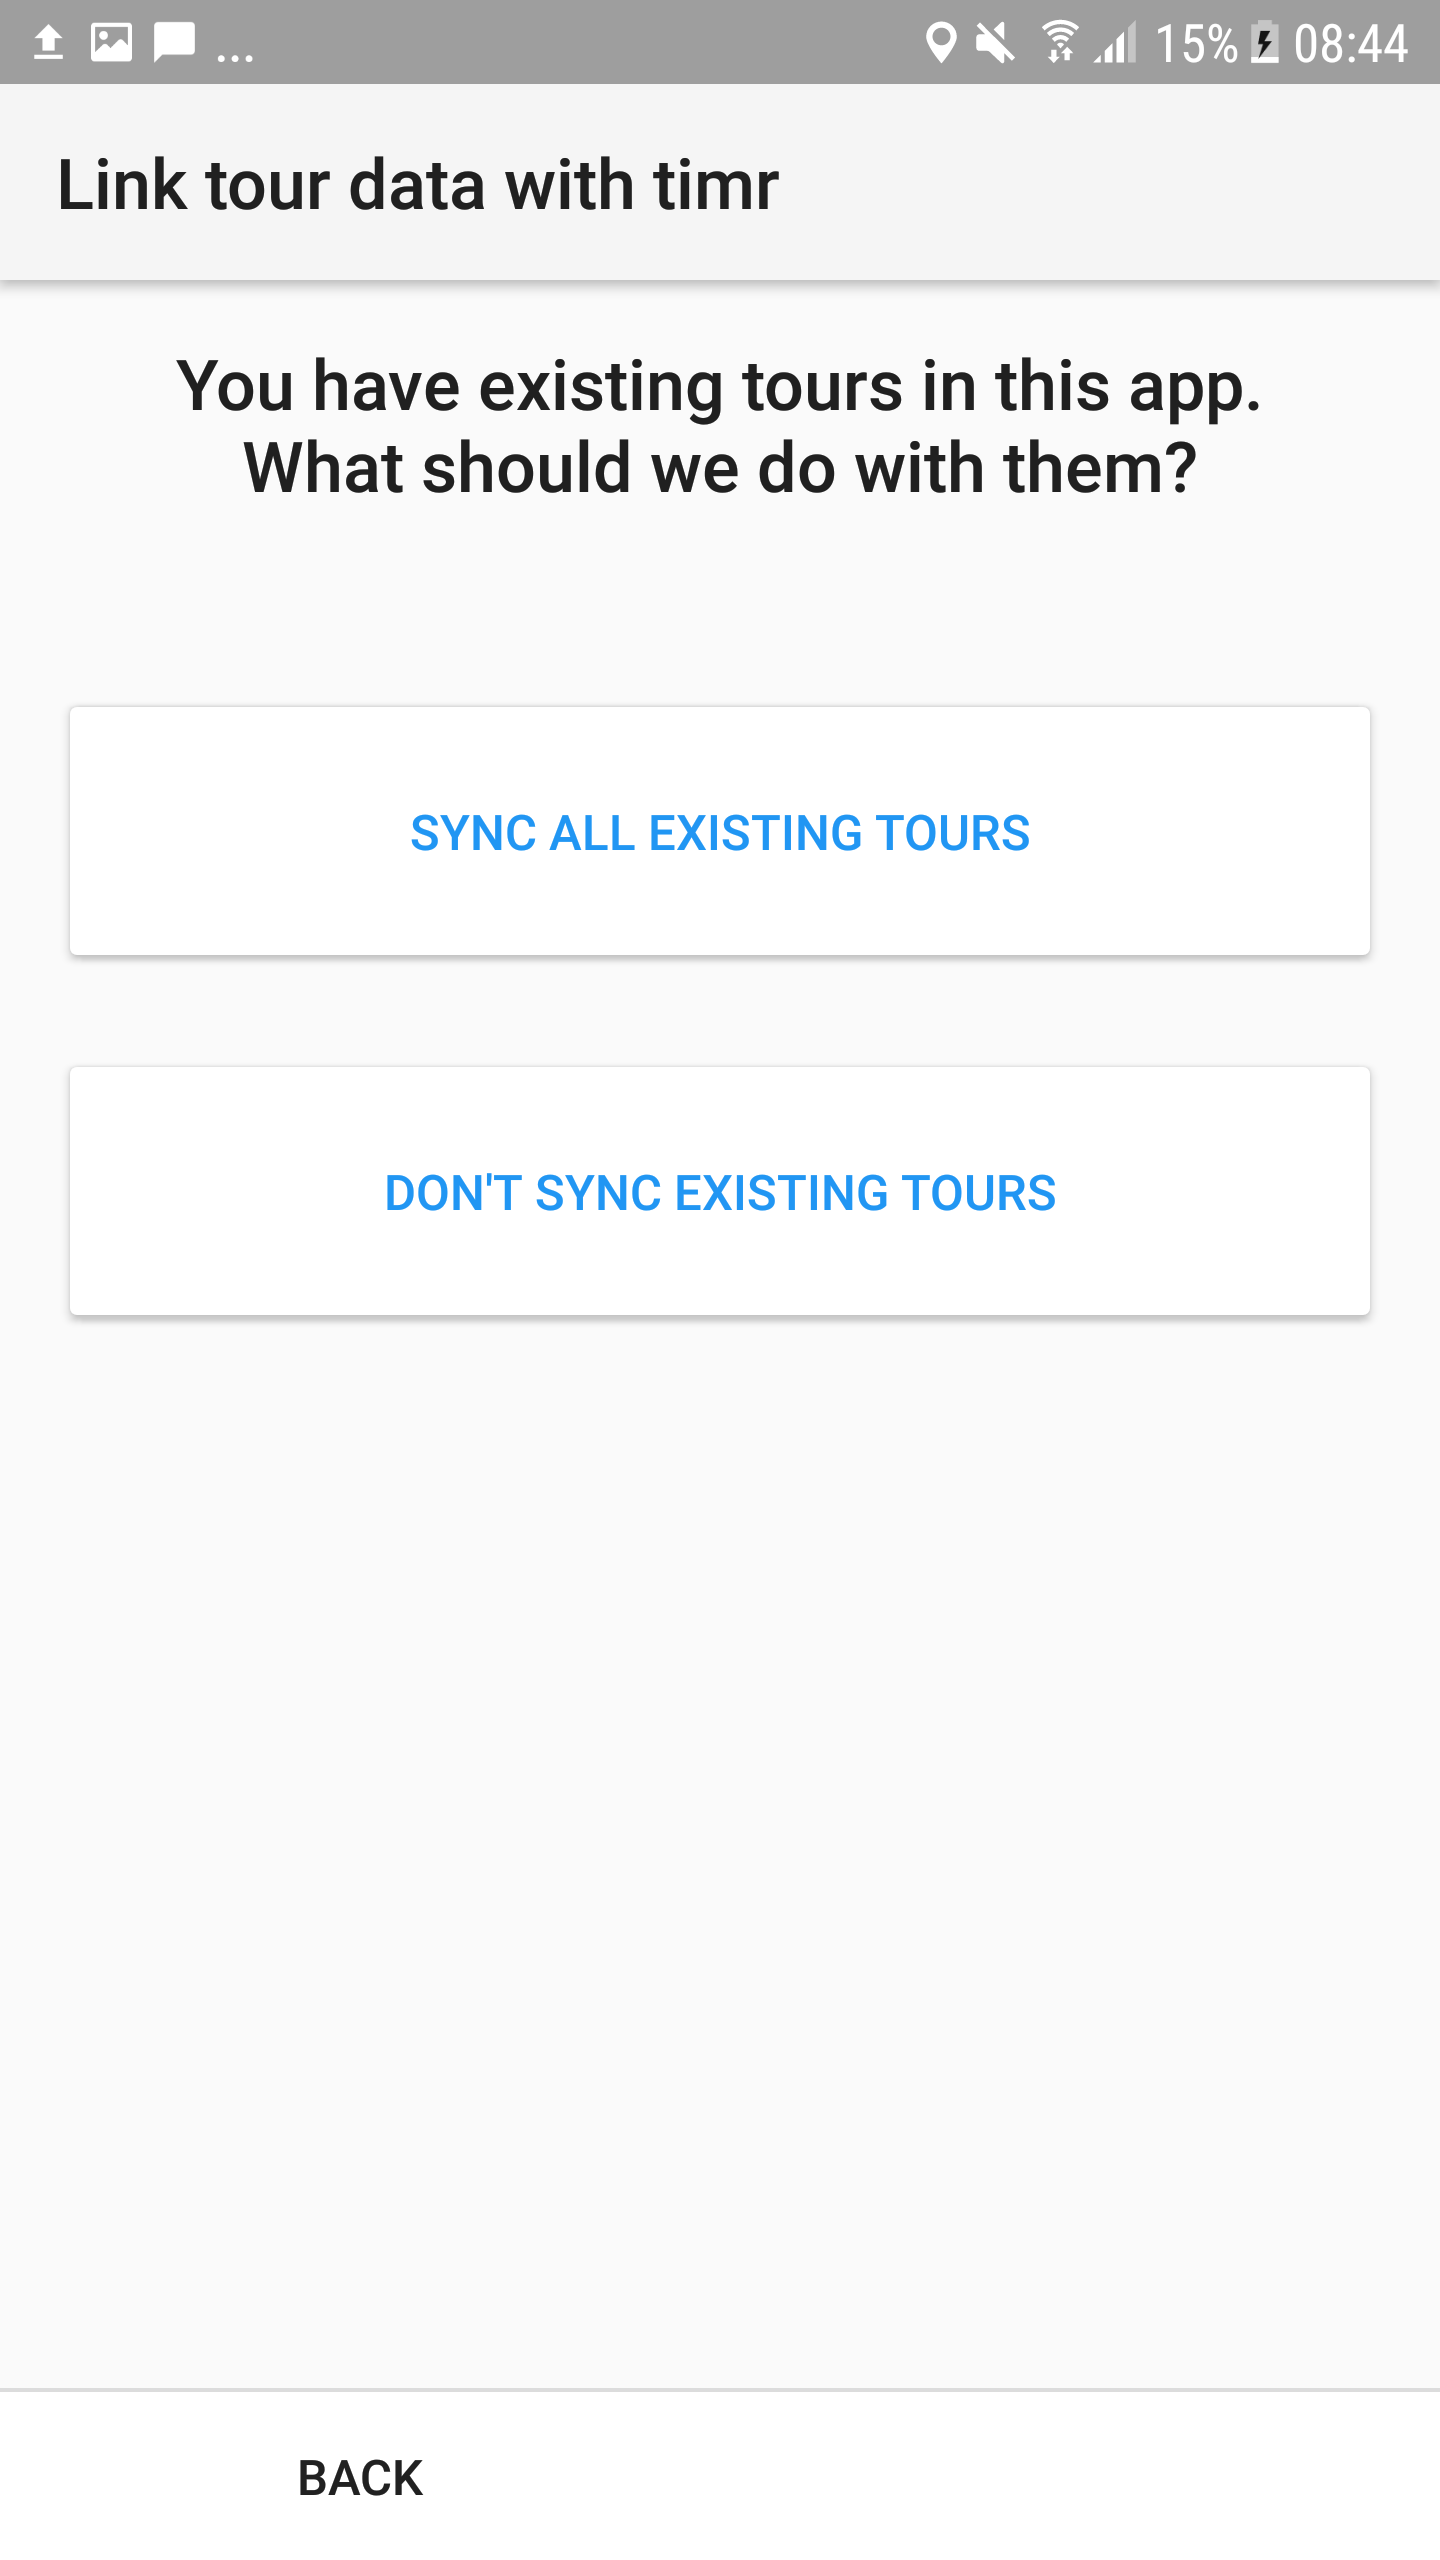
At last you can decide if your existing Tour mileage log should be synchronized with timr oronly those log entries from now on.
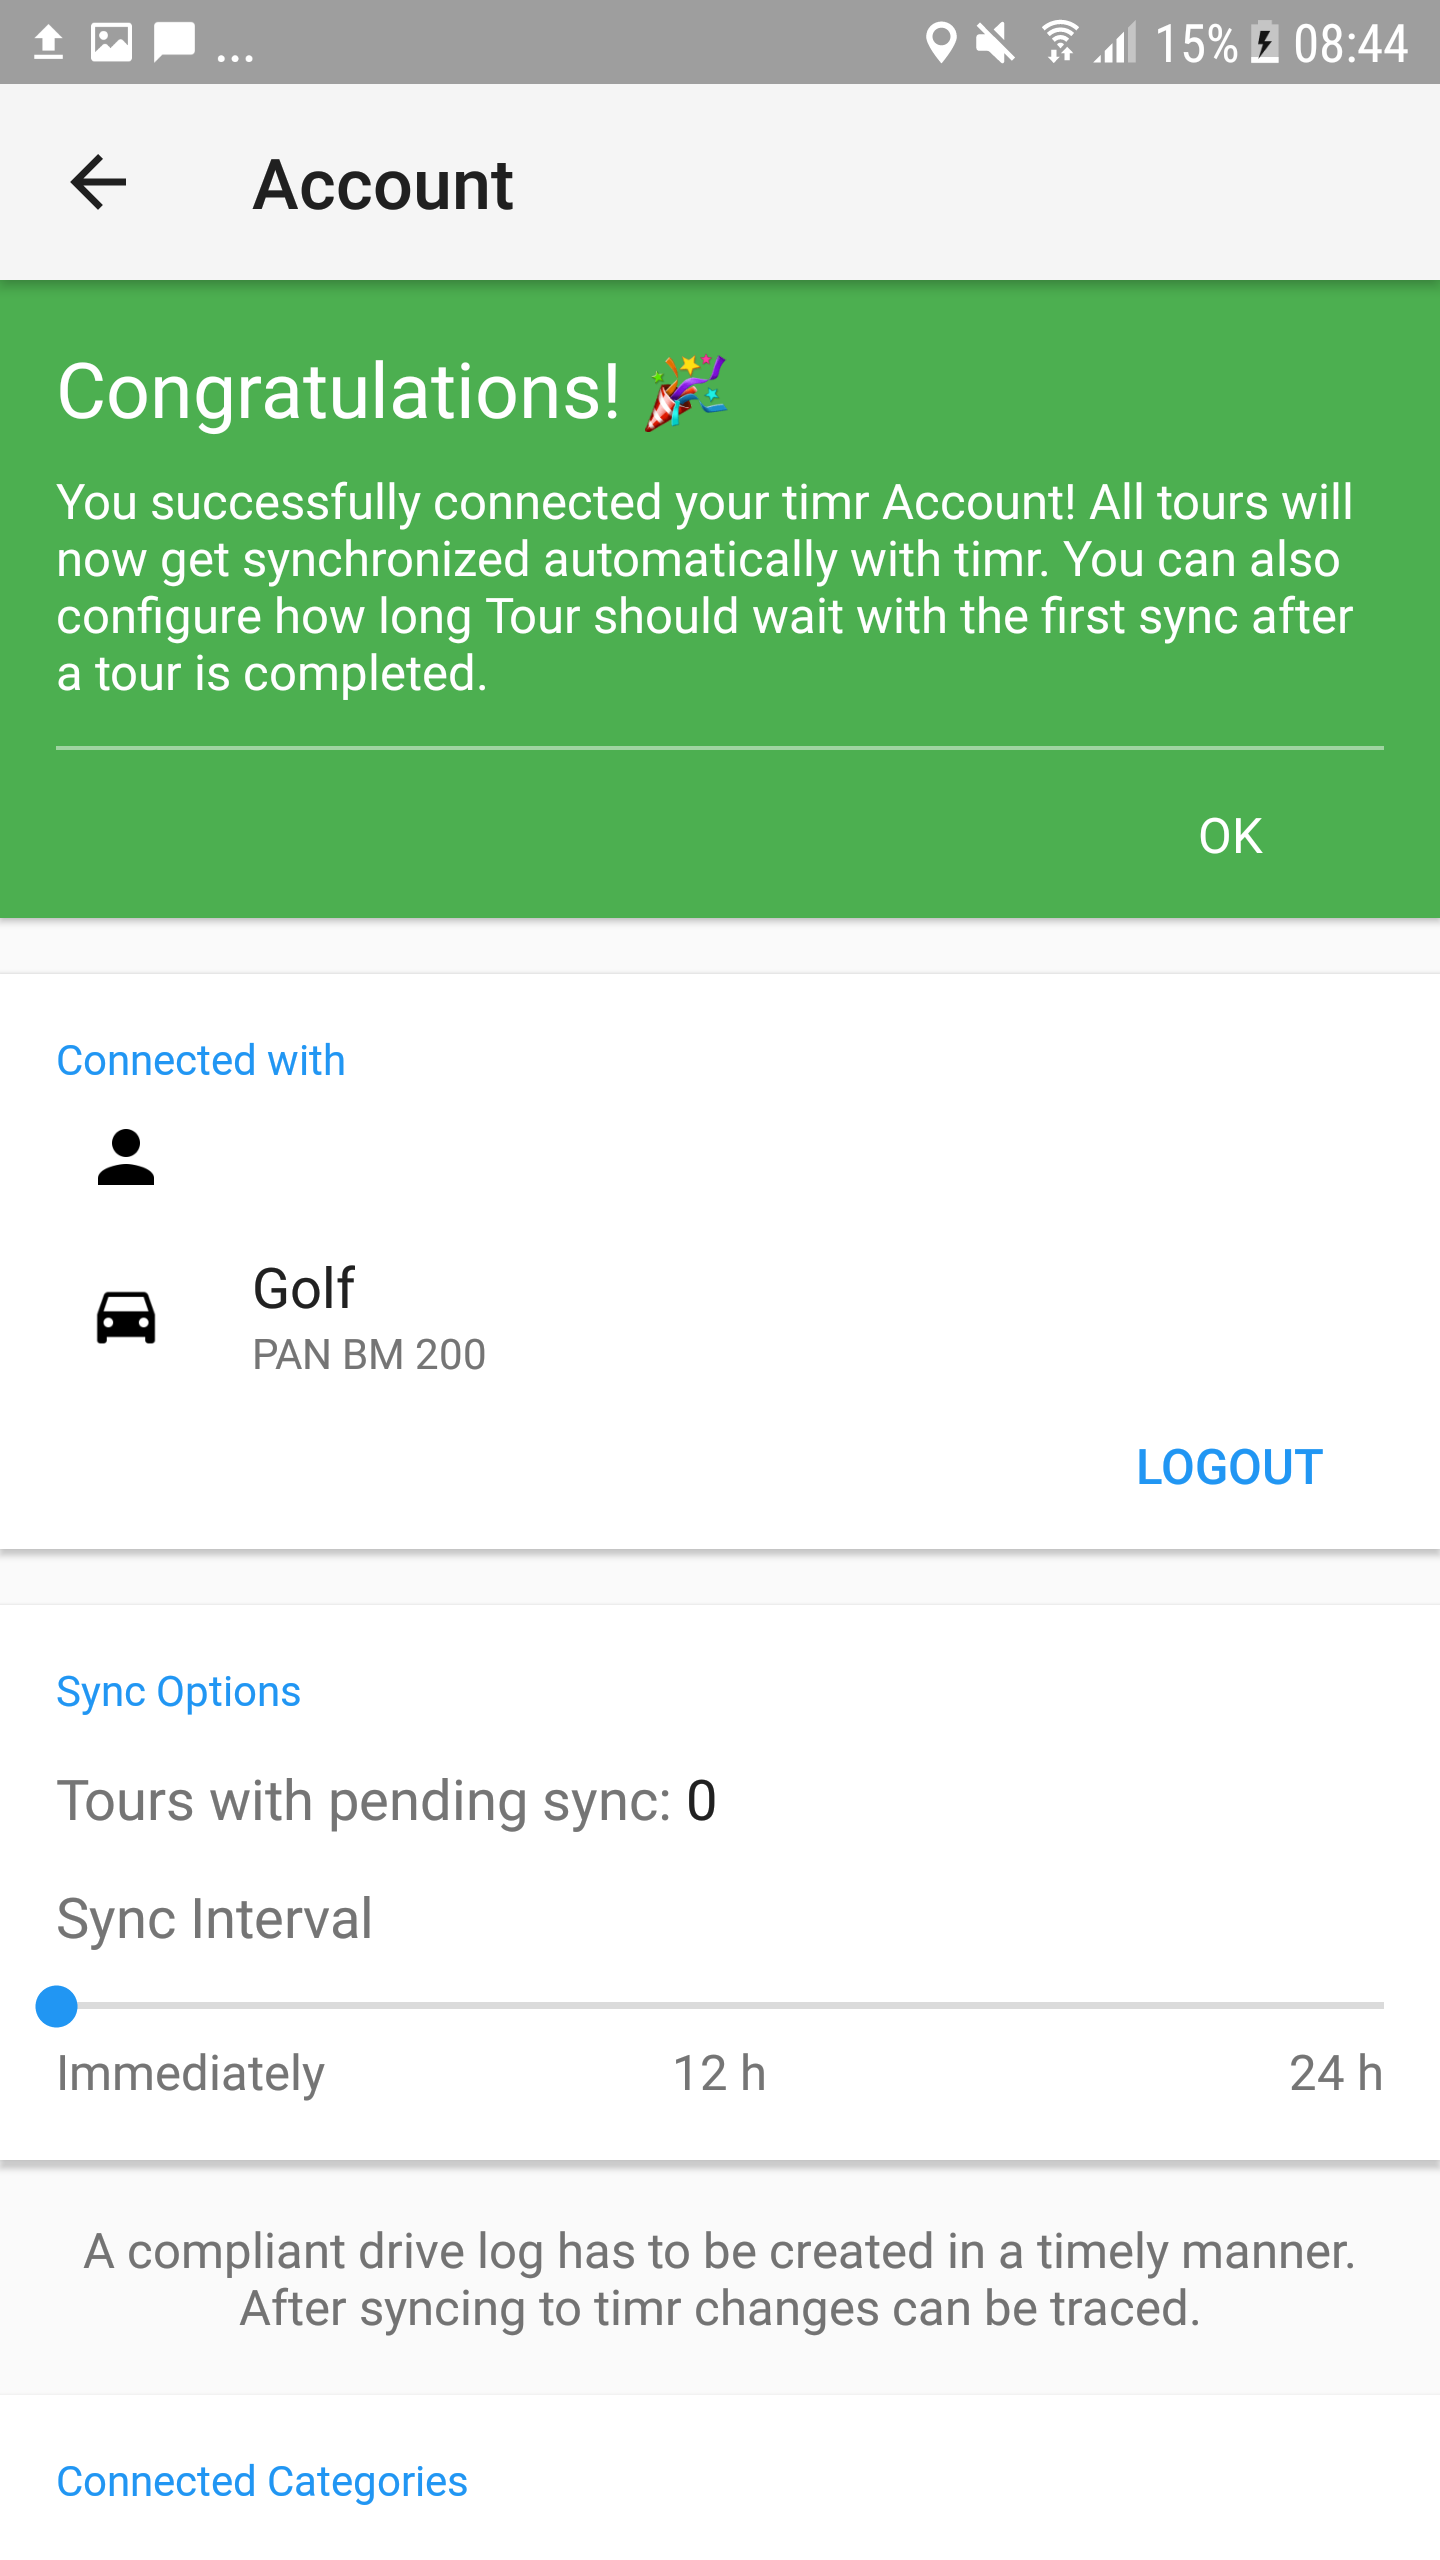
Now you have connected Tour successfully with your timr account. Lastly you can now configure when Tour should sync with timr on a regular basis.
0 Comments